Read our blogs, tips and tutorials
Try our exercises or test your skills
Watch our tutorial videos or shorts
Take a self-paced course
Read our recent newsletters
License our courseware
Book expert consultancy
Buy our publications
Get help in using our site
463 attributed reviews in the last 3 years
Refreshingly small course sizes
Outstandingly good courseware
Whizzy online classrooms
Wise Owl trainers only (no freelancers)
Almost no cancellations
We have genuine integrity
We invoice after training
Review 30+ years of Wise Owl
View our top 100 clients
Search our website
We also send out useful tips in a monthly email newsletter ...
Creating your first flows in Power Automate Desktop Part two of a three-part series of blogs |
---|
Creating your first flows in Power Automate Desktop
|
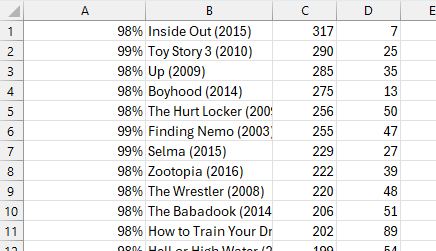
Importing the contents of a CSV file into Excel is a task you're likely to perform frequently. This blog will show how to create a PAD flow to automate the process.
A section of the CSV file I will import.
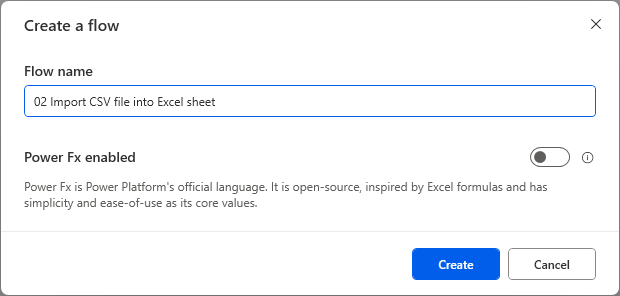
First create a new flow and give it a suitable name.
Always use a descriptive flow name.
PAD has limited options when dealing with CSV files.
I want to read from a CSV file.
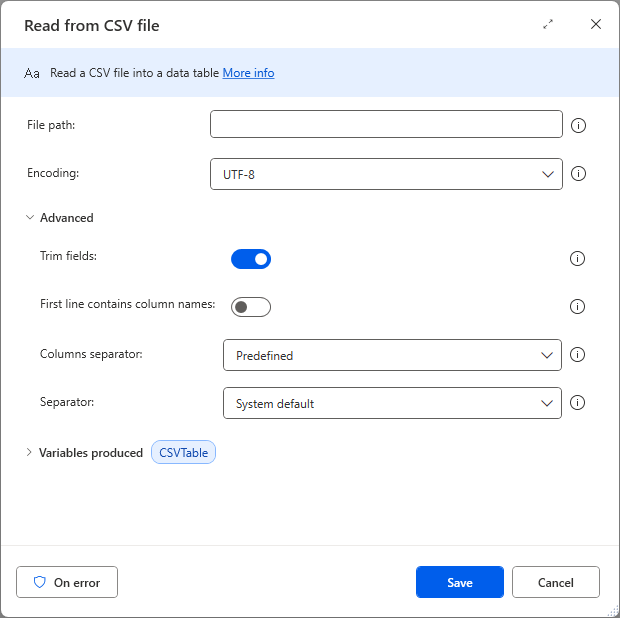
The Read from CSV file action has 2 main choices with some advanced options.
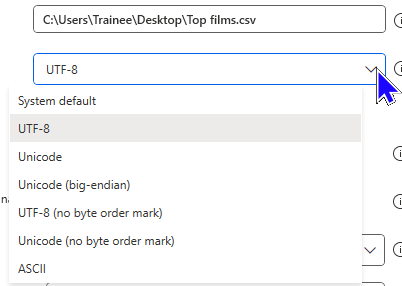
I need to set the file path for the CSV along with an encoding choice.
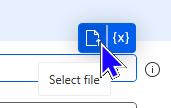
Clicking into the File path box will show the Select file icon
CSV files have various types of encoding and you should choose the appropriate one for your file.
If you are not sure which type is needed you should choose System default
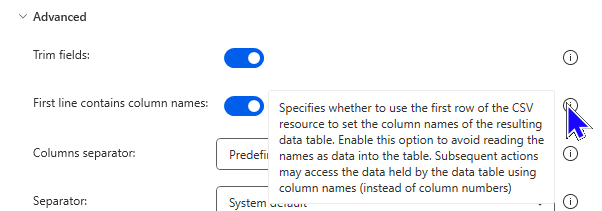
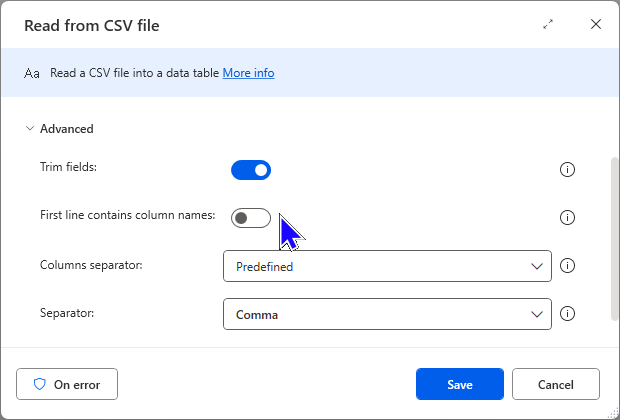
PAD offers some advanced options when reading CSV files.
For PAD actions you will often see an information icon next to the options.
Trim fields in the above image will trim any trailing or leading spaces of the data read from the CSV file.
My CSV has column names as the first row and as the help states, I want to include them in the resulting Datatable
The last 2 options are connected to how the data is separated in the source CSV file.
The default settings will work for the most files but you can still make your own choices as I have above.
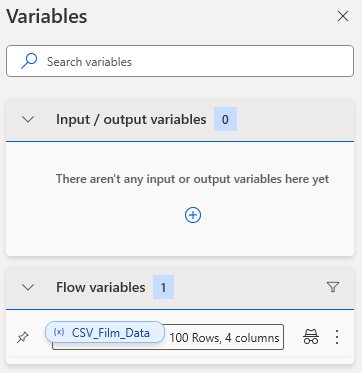
The Read from CSV file action produces a Datatable of the data extracted from the CSV and this variable can be renamed.
Renaming the variable that will store my CSV data.
Running my flow at this point should produce a PAD Datatable with the CSV data in.
Click to Run or you can press the F5 key.
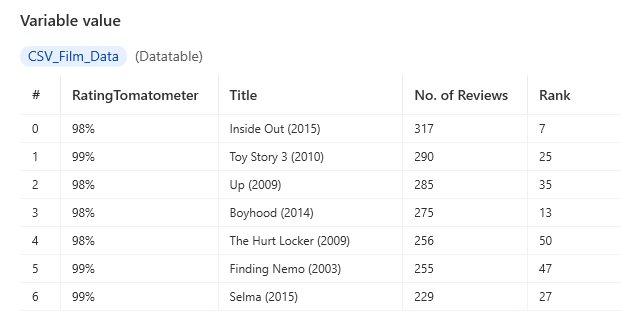
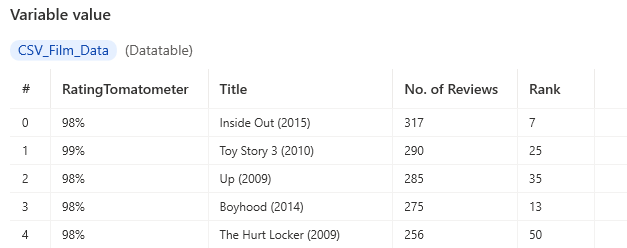
After running I can see some data is stored in the Datatable variable.
You can view the data being held in variables by clicking the 3 dots next to a variable and choosing View
The contents of the CSV appears to have been extracted correctly.
Now I will need to open Excel, write the stored data onto a sheet then close and save the file.
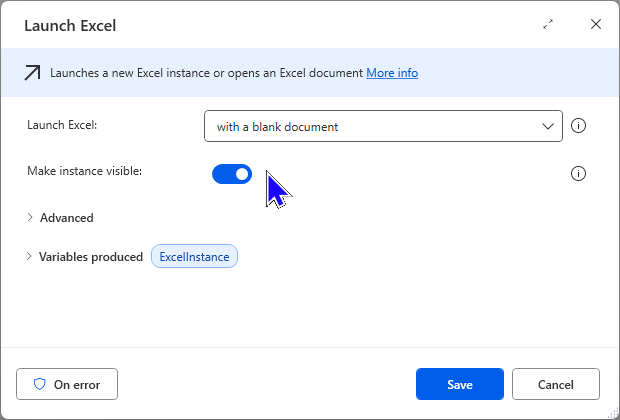
This action will launch Excel with a blank file.
Note the option in the image above to Make instance visible, If switched off Excel will be hidden when it opens.
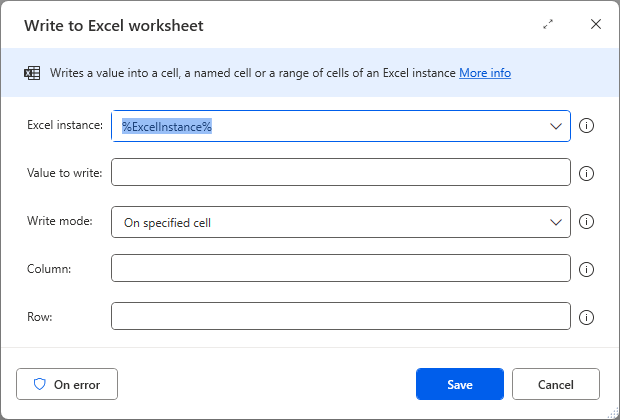
Now I need to specify what to write and where on the worksheet.
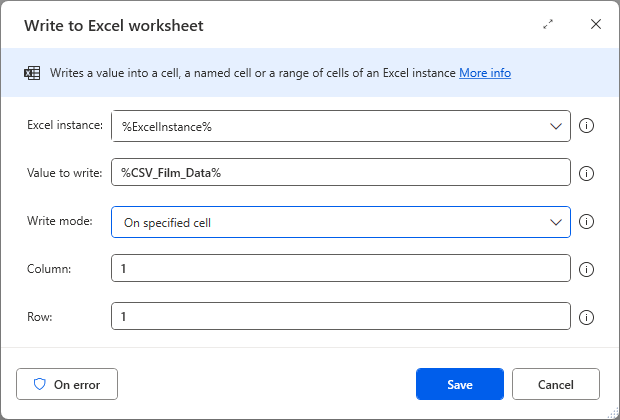
Because I am writing to a blank Excel file I can select row 1 and column 1 so that the data starts in cell A1.
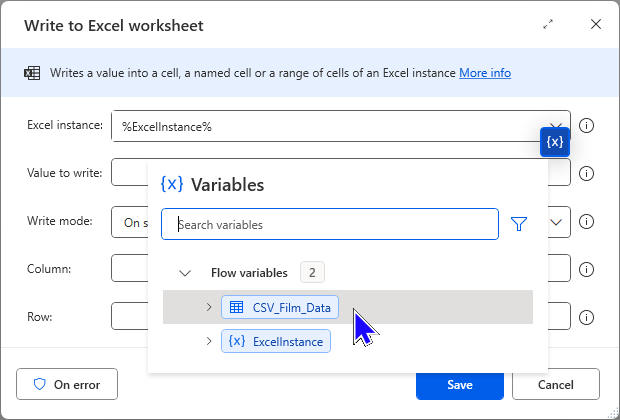
Clicking the blue {x} will give me the list of variables so i can choose the Datatable as the value to write to Excel.
All the relevant details are completed, now to test if it works.
It's a good idea to test the flow at this point to see if it does what I want it to, before I add the action to save the Excel file.
With PAD flows its always a good idea to test before saving files. Otherwise you may find you have to keep deleting the file generated if the flow encounters errors.
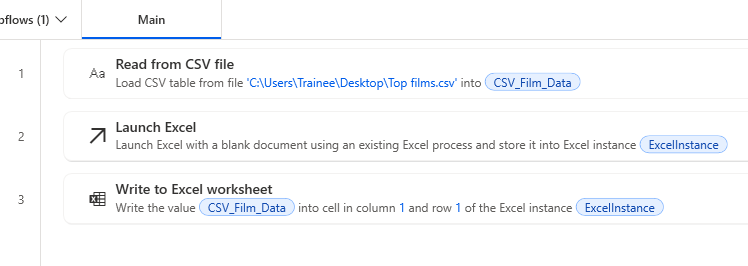
Here are the actions of the flow at this point:
The flow as it is should read the CSV data into the Datatable variable then write it to Excel in the cells stated.
And here's the result of running the flow:
Oddly there are no column headers, but everything else has worked.
When we read from the CSV file we enabled the First line contains column names option.
This had the effect of adding the column names to the Datatable but they are not then written to the Excel file as data.
Column names appear in the Datatable, but they are not part of the data.
Edit the Read from CSV file action under the advanced section to turn off the setting shown below.
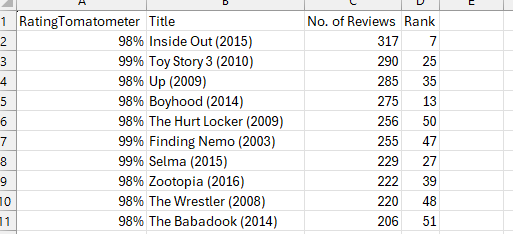
Switch off the option for First line contains column names then test again.
Much better!
Now the test was successful I can add an action to close the Excel file, saving it at the same time.
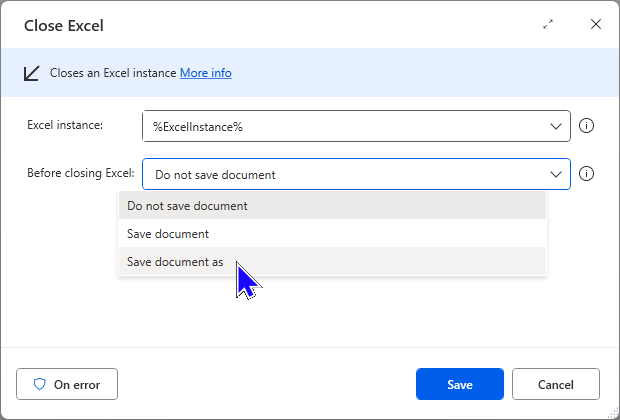
Choose the Save document as option in the Close Excel action.
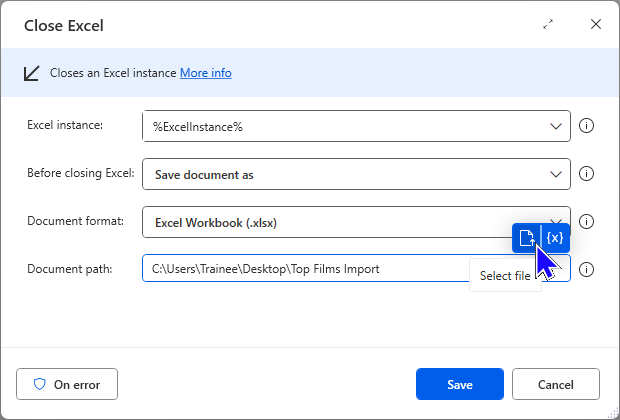
Now to add the file format, path and name.
The file extension is set along with the path and name. Clicking the blue Select file icon allows you set a path and name.
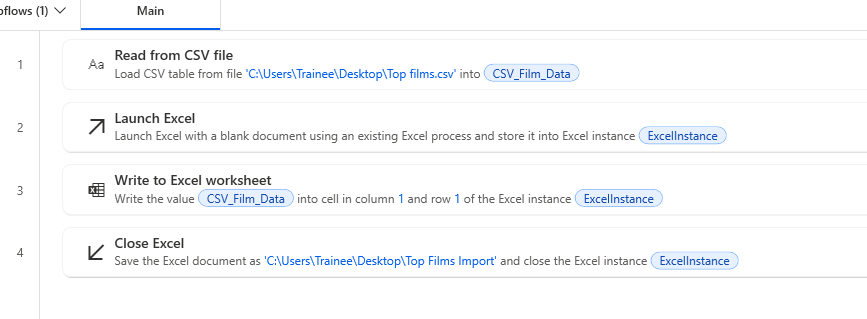
Here's the flow with the added action:
The completed flow which should result in an Excel file containing the data from the CSV file.
When I run the flow I should find a new Excel file called Top Films Import.xlsx in the correct location. When the file is opened I should see the data from the CSV file.
This file has now appeared on my desktop.
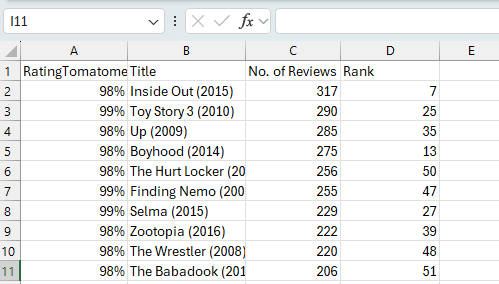
Opening the file shows the result of the flow.
Success!
See the other blogs in this series for more simple PAD flows.
Parts of this blog |
---|
|
Some other pages relevant to the above blogs include:
Kingsmoor House
Railway Street
GLOSSOP
SK13 2AA
Landmark Offices
99 Bishopsgate
LONDON
EC2M 3XD
Holiday Inn
25 Aytoun Street
MANCHESTER
M1 3AE
© Wise Owl Business Solutions Ltd 2025. All Rights Reserved.