In order to be able to write SQL, you need to have some tables to query! This blog shows you how you can create tables, and link them together using relationships.
Pre-requisites for Creating a Database
Before you can create tables in SQL Server, you need to know the following:
Topic | Notes |
|---|
Designing databases | A SQL Server database consists of two or more tables linked together using relationships. You can see how to design databases - and what this term means - in my earlier blog on database design. |
Using SSMS | The usual tool for creating tables using SQL Server is called SQL Server Management Studio (or SSMS). You can see an introduction to Management Studio here, and see how to configure some useful options. |
Our Database
This blog will show how to create a simple two-table database looking like this:
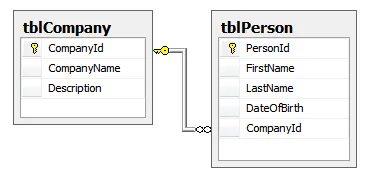
Our database will contain two tables: one to hold companies, and another to hold the staff who work for them.
In this database, each table has a primary key (the field shown above with the key symbol next to it). This is the field whose value uniquely determines which record we're looking at.
For example, there may (will!) be lots of people in the tblPerson table called Andy Brown, but there will only be one person with a given id number of 317265.
Creating our Database
To create a new database, first connect to a server, then right-click on the server and choose to create a new database:

Right-click on Databases, and choose to create a new one.
You can now type in a name for your new database (here I've gone for BlogExample), and choose to add it:
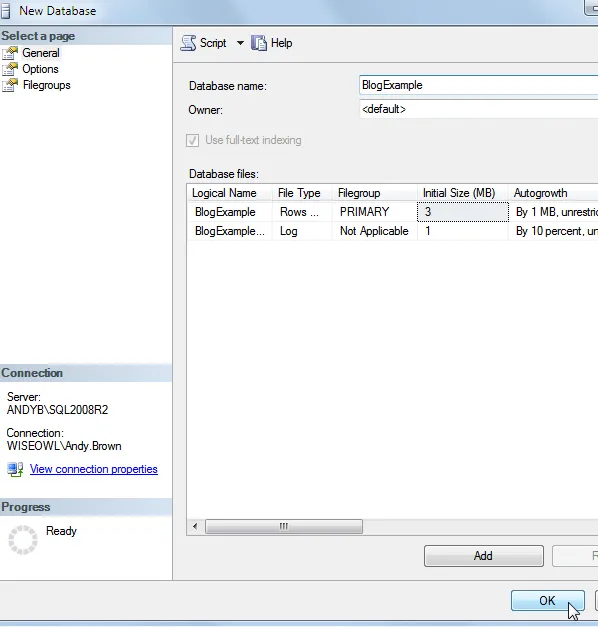
Type in the database name then select OK.
As the above dialog box shows there are a lot of ways in which you can control how SQL Server will create and manage your database, but this blog is meant to be part of a tutorial on writing SQL, not database administration! Choosing all of the default options should work fine on your computer.
After creating your database, I'd recommend refreshing the list of databases on this server to ensure that the new one you've just created appears in the right position:
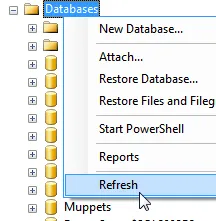
Right-click on Databases again, and this time choose to refresh the list.
Your new database should now appear in the correct position in alphabetical order:

The new database appears in the list of databases.
Now that we've got a database, you can create tables within it - read on!
If you expand the database that you have (I hope) just created, you can see that it already contains a Tables category:
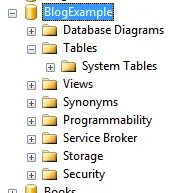
Any tables that you create will appear in this list.
To create a new table, just right-click:
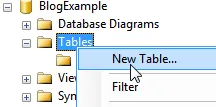
Right-click on Tables to create a new one.
SSMS will produce a 3-column grid for you to fill in:

The start of a new table.
Specifying the Table Columns
Every column that you create in a table has 3 pieces of information that you can fill in:
Information | What it contains |
|---|
Column Name | The name of the column or field (don't use spaces). |
Data Type | The type of data for the column. |
Allow Nulls | Whether it is possible not to enter a value for this column for a record (so, for example, you would untick this box to make sure that someone fills in a person's name, but leave it unticked, perhaps, for the date of birth column, which can be left blank). |
Here is what you would probably create for our example tblCompany table:

The columns would give the unique number of each company, its name and a description of what it is and does.
You should refer to this separate tutorial for the possible data types that you can use.
Identitiy Columns
You now want to make sure that every time someone enters a new company, it is automatically assigned a number one bigger than the previous one (that way, you can be confident no two companies can ever share the same number). Here's how to do this. First, make sure you have the id column selected:

First select the CompanyId column.
You can now tell SQL Server to increment its value automatically:
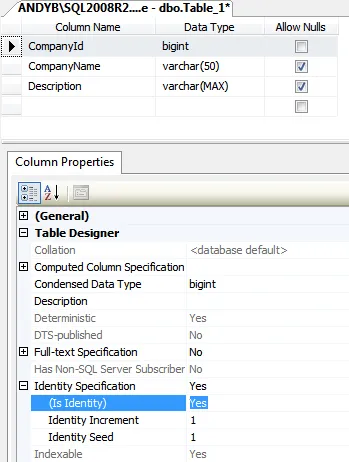
Expand the Identity Specification category, and tell SQL Server that this column is an identity one. You can also specify the increment and seed (although usually you'll set these both to 1 - see hint below for what they mean).
Suffer from triskaidekaphobia? Set the identity seed to 14 and the increment to 2, and your numbers will go 14, 16, 18 ... instead of 1, 2, 3 ... !
Creating a Primary Key
Every table in SQL Server should have a primary key (it's virtually a requirement). This is usually - although not always - a single column. The primary key is the field whose value uniquely identifies a record. Here are some examples:
Table | Primary key |
|---|
National Insurance database | National Insurance number |
NHS database | NHS number |
Your company's personnel system | Your personnel number |
In our example, the primary key is going to be the CompanyId column, so you can right-click on this and set it:
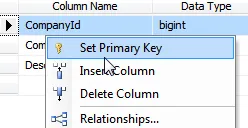 |  |
Right-click to set the key ... | ... to get a key symbol next to it! |
Saving the Table
Having created all of the columns, set the identity column and set the primary key, you can just close down your table, at which point you'll be asked to name it:

Click on this icon to close a table.
You can now choose that you want to save the table:
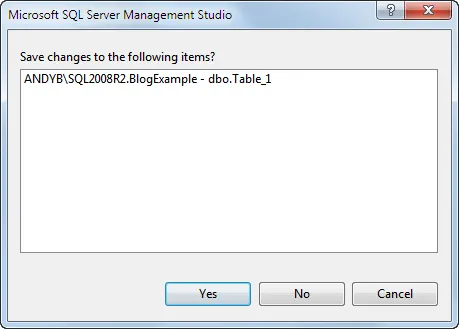
You'll have a chance to choose a different name if you choose Yes!
It's a convention in SQL Server to prefix table names with tbl, although you don't have to follow this convention:
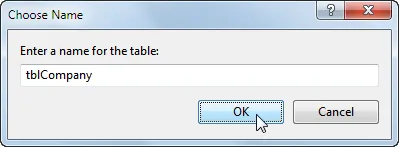
Type in a name for your new table, and select OK.
Your new table should appear in the list of tables for this database:
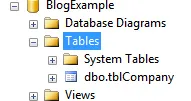
If you can't see the table you've created, right-click on Tables and choose to refresh the list.
The Table of Persons
You could now repeat the steps shown above to create the table of people for our database:
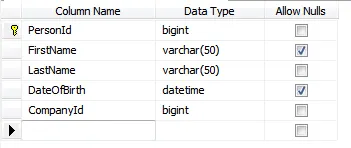
The table of people, called tblPerson. The columns are listed below.
The columns in this table are:
Heading 1 | Heading 2 |
|---|
PersonId | The unique number for each person (the primary key, which should be set to an Identity column). |
FirstName | Each person's first name (we allow this to be empty, or null). |
LastName | Each person's last name (must be filled in). |
DateOfBirth | The optional date of birth for each person. |
CompanyId | The number of the company each person belongs to. |
Again, the possible data types you could have used are explained in this separate tutorial.
Entering Records for a Table
Having created a table, you can right-click on it to enter data for it:
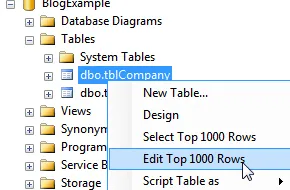
Right-click on a table to edit its data.
Here's what you could type in for our example for the companies table:
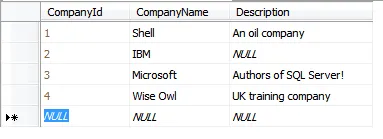
Here we've created 4 companies. SQL Server always shows a blank row for a new record.
Note that you can't type in a value for the CompanyId, as this will be generated automatically by SQL Server. If you don't want this to happen, don't make the column an identity column!
You could now close this table down, although you don't need to - each record is saved as soon as you move off it.
It's now time to repeat these steps to type in some people into the tblPerson table:

Our 7 people: 3 work for Shell, 2 for IBM, 1 for Microsoft and 1 for Wise Owl.
Note that you have to know the company ids to enter them in the table (for example, if David Richards works for Shell, you need to know that the CompanyId for Shell is 1, and type this into the tblPerson table against his name). Most applications will contain a front-end form featuring a drop list to make this easier, so that users don't have to memorise the id numbers for each company!
The Next Stage
Now that you've created two tables, it's time to tell SQL Server that there is a relationship between them (and prevent someone from assigning a company id to a person when no company with that id exists in the parent tblCompany table). This is the subject of the next part of this blog!
If you've been following this blog, you should now have the following two tables:
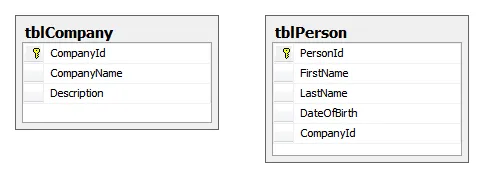
You should have a tblCompany and a tblPerson table.
What we now need to do is to tell SQL Server that the CompanyId column in the tblPerson table for any person must match up to one of the values for the CompanyId field in the tblCompany table!
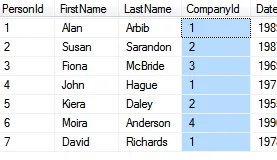 |  |
The company id here ... | ... must match the id here. |
You could argue that SQL Server should guess the relationship above, but SQL Server can be like one of those irritating people who need everything spelt out formally (it lacks common sense sometimes!).
Creating a Database Diagram - Start
The easiest way to create a relationship is to drag a column from one table onto another, using a database diagram. To create one of these, just right-click:
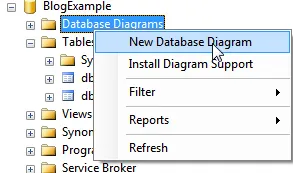
Right-click on Database Diagrams for the current database, and choose to insert one.
What you will often get then is this message:

This error message often appears when you try to add a database diagram.
The problem is usually that you're using Windows authentication to log into your database, and the owner of the database doesn't have a valid log-in account assigned.
There are two ways to log on to a SQL Server database. One is to specify a valid name and password (SQL Server authentication); the other is to rely on your Windows log-on giving you sufficient rights to view the SQL Server database also (Windows authentication).
Changing who Owns your Database
To solve the problem above (if you have it - if not, ignore this section) first look at the properties of your database:
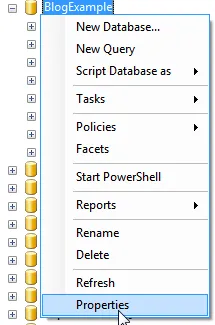
Right-click on your database and choose to show its properties.
You can now see who the database's owner is by following the steps below:

Follow the steps below to find the owner of your database!
The numbered steps above are:
Select Files.
You can now see the owner's name.
In this case the owner of the database is the person with Windows logon id DOMAIN_NAME\Basil.Brush. You can now change this:

Click on the build button shown to change the database owner.
You now have two obvious choices for the owner to use:
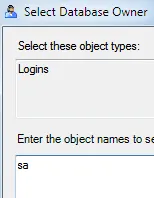 | 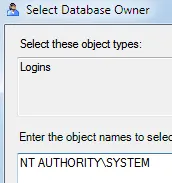 |
The sa account | The Windows account |
In my experience either will work, although it's a good idea to check the name you've entered:
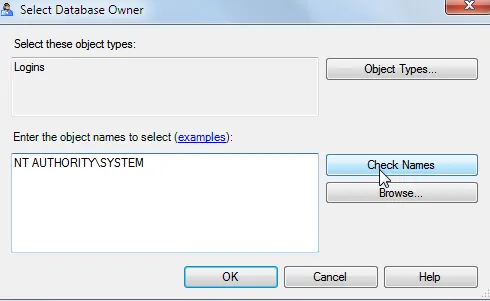
Click on the button shown to check you've entered a valid account name.
You should now be able to continue to create a valid database diagram. If the above change makes you uneasy, you can always create the database diagram and then revert back to the previous user.
You can even change accounts using an SQL query:
ALTER AUTHORIZATION ON DATABASE::BlogExample TO sa
GO
I wouldn't claim to be an expert on SQL Server security, but the above steps work for me. Googling suggests that this won't have any effect on the security of your database, but you shouldn't take my word for this!
Creating the Database Diagram - Finishing the Job
Now that you can create a database diagram, do so:
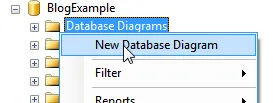
Right-click on Database Diagrams and choose to add a new one.
Choose the tables that you want to link, then click on the Close button:
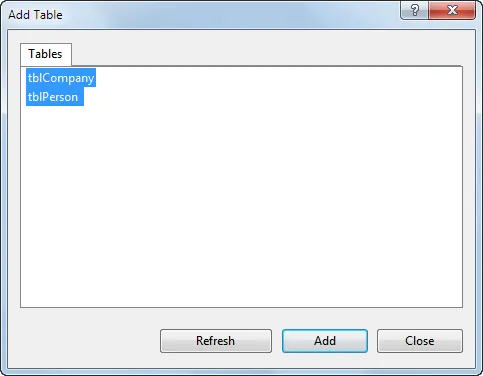
Here we're linking the two tables in our database.
If you have a complex database, you could have several different database diagrams, each showing the relationships for a particular part of your database.
You can now tidy up your diagram by dragging tables round:
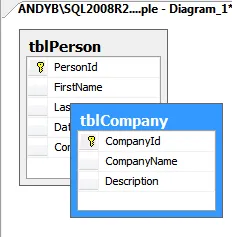 | 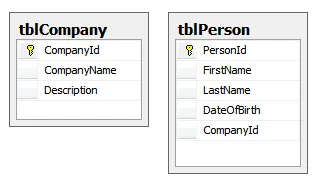 |
How it first appears. | How the final version might look. |
Creating a Relationship
To link two tables formally, drag a column from one table onto the matching column in the other:
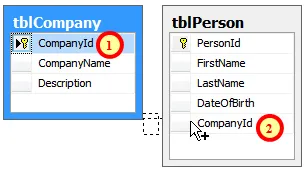
To create our relationship:
You will usually only create a relationship between two columns if they both have the same data type (here both are bigint fields), and if one of the two columns is the primary key in its table.
SQL Server will show a dialog box asking you to confirm that you've linked the correct two fields, and giving your new relationship a name:
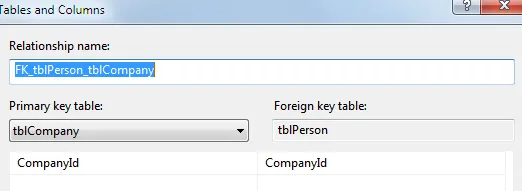
The two tables are called the primary key table and the foreign key table.
I wouldn't recommend renaming the relationship. The name has to be unique within the database, and the default name chosen by SQL Server does a pretty good job of ensuring that this will always be the case.
As already explained, the CompanyId column is the primary key in the tblCompany table. In the tblPerson table it is known as the "foreign key", since it looks up information from a different table.
Choosing Cascade Update and Cascade Delete Options
This topic is discussed in more detail in my earlier blog on database design, but I'll go through it again here.
If you expand the INSERT and UPDATE Specification category which appears when you choose OK in the dialog box above, you'll see a Delete Rule and an Update Rule appear. Each of these has 4 choices, as shown below:
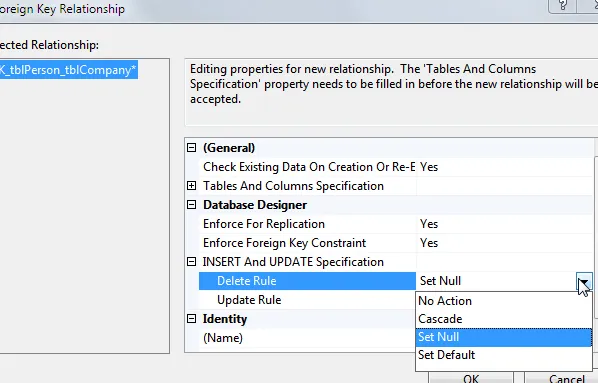
There are four choices for each of the two rules, as shown below.
The rules govern what should happen when you delete or change rows:
Rule | What it controls |
|---|
Delete Rule | When you delete a parent record (in this case, a company), what should happen to all of its associated children (in this case, the people who work for the company)? |
Update Rule | When you change a parent company's CompanyId number, what should happen to all of the child people records having the same company id? |
The options are as follows:
Action | What it means if you delete a company |
|---|
No Action | The orphan children (the people working for the company) will be left in the database (so there will be people records who have a company id which doesn't exist in the companies table). This is a bad idea! |
Cascade | SQL Server will automatically delete all the people who worked for the company. Sound a bad idea? The answer is not to delete the company in the first place! |
Set Null | The CompanyId column will be set to Null for all of the people who worked for the now deleted company. |
Set Default | The CompanyId column will be set to the default value for each person who worked for the now deleted company (provided that a default value has been set). |
To me the best option has always seemed to be Cascade - if you delete a company, you'll probably want to delete any people attached to it. However, all of the choices (apart from the first one) make sense.
The Final Relationship
When you select OK again, you should now have a link between your two tables:
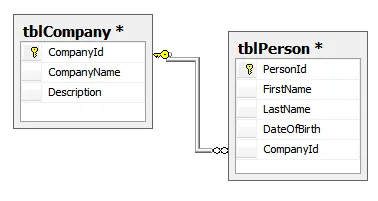
The relationship shows as a line.
You can now have great fun altering how this line looks:
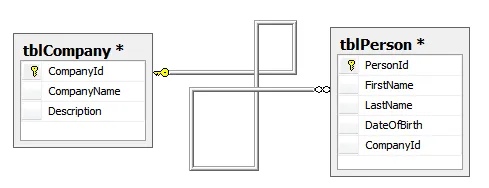
Clearer now?
The most unforgivable feature of any Microsoft software application? As you move tables around in a database diagram, relationships don't appear to join the correct two columns (as in the example above, where the line appears to join the CompanyId column in the companies table to the FirstName column in the person table). If Microsoft can get this right in Access, why not in SQL Server?
When you save the database diagram, you'll be prompted to give it a name:
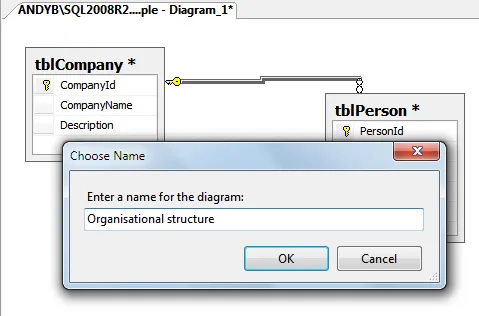
Here we've called our diagram Organisational Structure.
Finally, you can confirm that you want to make changes to all the affected tables:
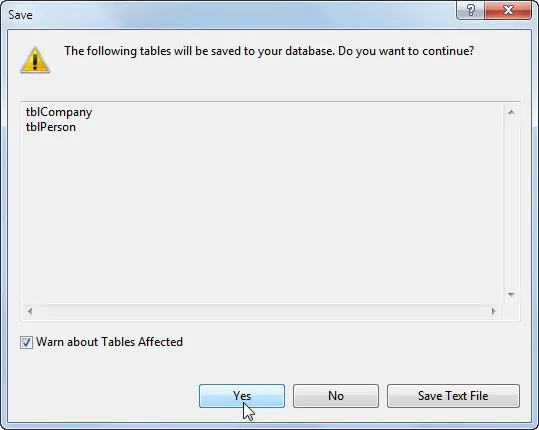
Confirm that you want to change the two tables concerned.
You now have a database diagram, whose structure you can change at any time:

Our new database diagram shows up in the list.
Another Way to Create, View and Edit Relationships
Using database diagrams is the easiest way to create relationships, but there is another way - you can edit the design of either table involved:
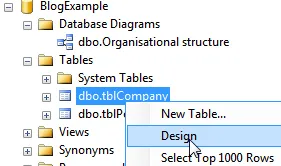
Right-click on either table and choose to change its design.
With the table now open for viewing and design changes, choose to view its relationships:
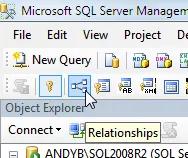
Click on this tool to view the relationships for the open table.
You can now view and edit the details for each relationship that you've created for the table:
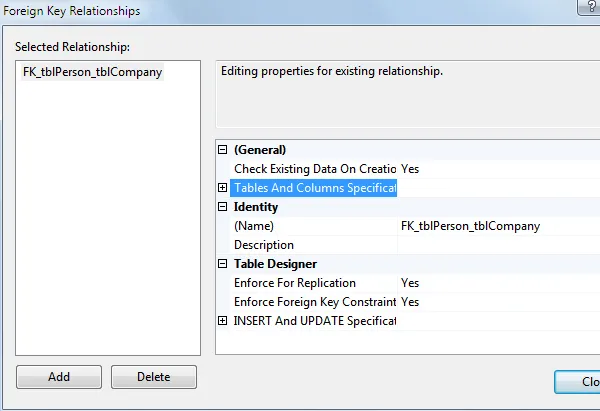
You can change the name of a relationship, which columns it affects, etc.
When you've finished, just close down the dialog box to save your changes. You've now completed the creation of your tables and database, although for the sake of completeness the final part of this blog series shows how to create an index, to speed up the database.
If you've been following this blog so far, you've now got two tables linked together with a relationship:
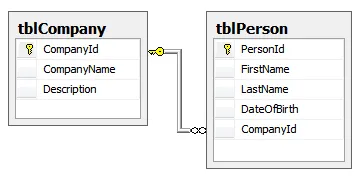
The two tables in our database, with the relationship linking them together.
The last thing I'll look at in this blog is how to speed up sorting of tables, by indexing columns.
What is an Indexed Column?
Imagine if you create and run a query showing all of the people in your database:
SELECT
PersonId,
FirstName,
LastName
FROM
tblPerson
ORDER BY
LastName
When you run this, you'll get the following results:
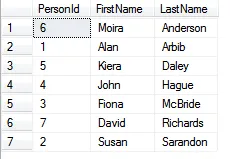
The people in surname order. Moira Anderson appears first, as her last name comes first in alphabetical order.
To produce these results, SQL Server has had to sort the rows by the LastName field. For 7 rows this will be almost instantaneous, but for 700,000 rows you could be waiting a while. That's where indexing comes in. You can think of indexing as keeping track for a column of where its value appears in alphabetical or numerical order in a table:
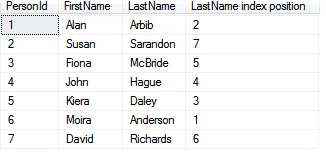
The index shows where each person would appear in the list if you were to sort the table by the LastName column.
As a guide, you will typically index about 4 or 5 columns in a table. These should include:
columns that form one part of a relationship (the CompanyId column for our example); and
columns that you frequently will want to sort by (the LastName column, probably).
The downside of indexing columns is that it takes longer to add new records (indexes also take up a fair amount of memory).
Creating an Index
To index the LastName column as above, first go into design view for the tblPerson table:
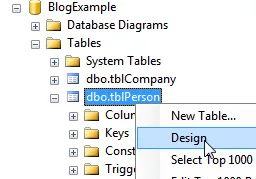
Right-click on the table whose column(s) you want to index, and choose Design.
Choose to edit the table's indexes (should this be indices? I think not in this context):
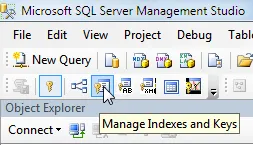
Click on the tool shown (if you can't see this Table Designer toolbar, use the menu shown below instead).
Instead of clicking on the tool shown, you could use the menu:
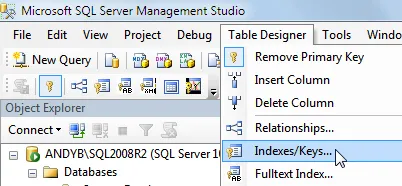
Choose this menu option as an alternative to the tool shown.
The dialog box which appears shows that you already have one index created - the primary key for the table - but you can click as shown to create another:
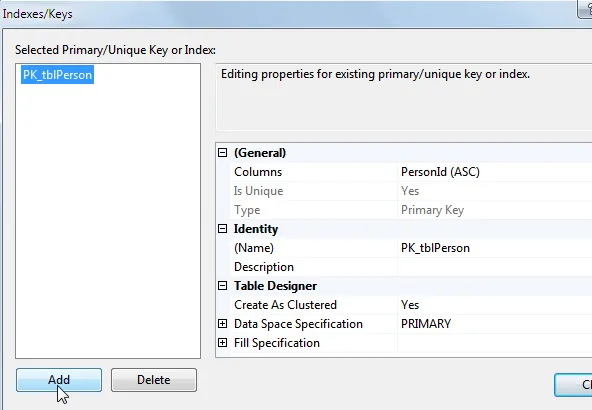
The primary key is automatically an index - but you can Add another index.
You can now specify how your index will behave, by completing the following steps (as shown in the diagram below):
Choose which column or columns you want the index to affect (when you click in the box, you'll have the chance to change the column). Here the index will be for the LastName column.
Choose whether duplicate values for the index are allowed. Here the LastName isn't unique (once you've entered one person called Smith in the table, you don't want to be restricted from entering any more). Typically only the primary key in a table is unique.
Give your index a name. As for relationship names, index names have to be unique for a database. One way to ensure that this is the case is just to suffix the default name given (IX_tblPerson) with the name of the column being indexed.
Optionally, type in a description of the index.
Here are these numbered steps:
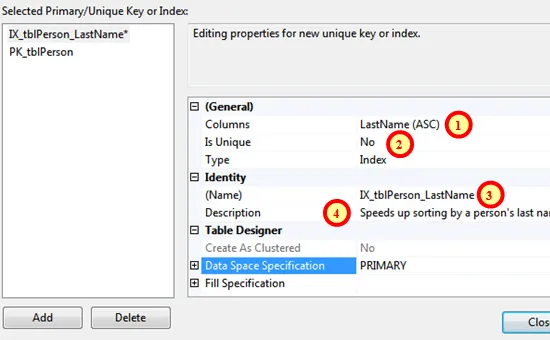
Complete the numbered steps as shown above.
When you've finished choose Close, then save and close your table.
As mentioned earlier, columns which are part of relationships will not automatically be indexed by SQL Server - so you should also index the CompanyId column in the tblPerson table.


