Before you start writing SQL queries it's worth spending a little time setting up the SQL Server Management Studio environment to make query-writing as simple as possible.
Opening Management Studio
In order to change the settings in Management Studio, you first have to open it! The screenshot below shows how to do this for a default installation of SQL Server 2022.
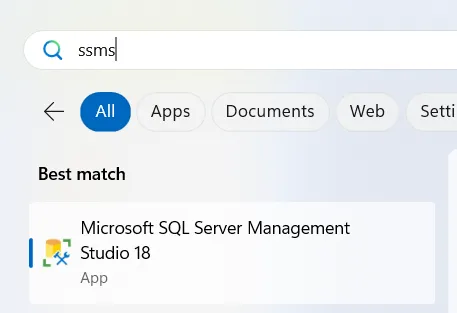
The option for Management Studio will be in a folder similar to this one in the Start menu.
Connecting to a Server
When you first open Management Studio you'll be asked which server you'd like to connect to. You don't have to pick one at this stage, but it makes sense to do so.
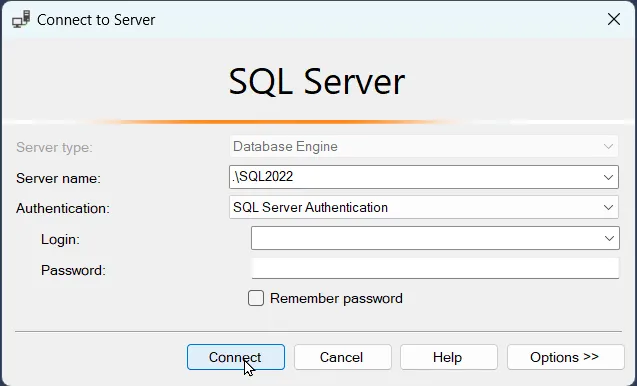
Choose which server you want to connect to and click Connect. You may have to provide a login and password depending on how the server has been configured.
You don't need to be connected to a server in order to make changes to the settings in Management Studio, but the effects of some changes are easier to see if you are.
At this point you should be looking at the SQL Server Management Studio environment.
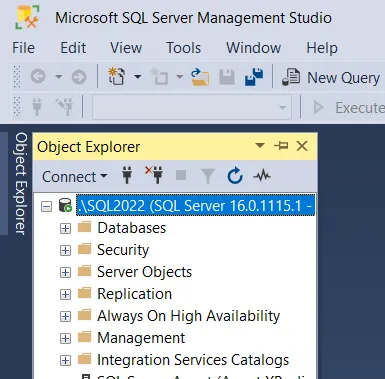
This is what your screen should resemble. The Object Explorer window on the left shows you all of the objects stored on the server you chose to connect to.
If you chose not to connect to a server when opening Management Studio you can do so now, as shown in the diagram below:
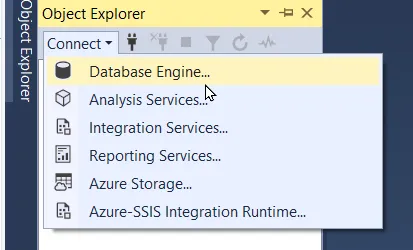
Click the Connect button and choose Database Engine... from the list. This will open the dialog box that appears when you first open Management Studio.
The Options Dialog Box
To change most settings in Management Studio you need to use the Options dialog box. To display it, from the menu choose: Tools -> Options...
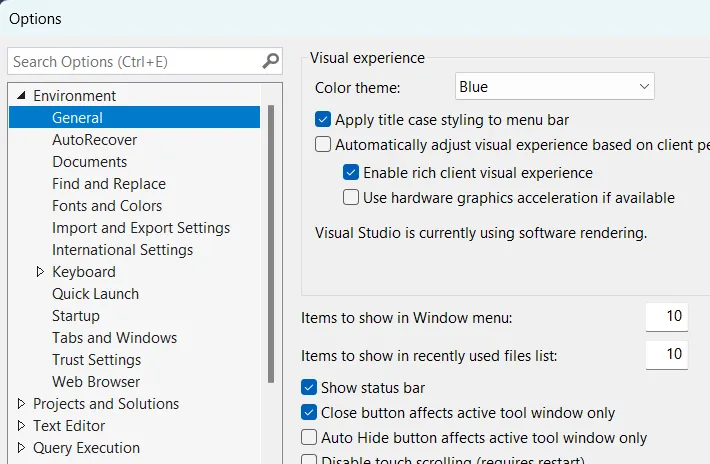
The first page you see when opening the Options dialog box.
There are all sorts of things that you can change using the Options dialog box in SQL Server Management Studio. Below are some of the more useful things that you can modify to make your SQL coding experience more enjoyable, or at least less painful!
Fonts and Colours
If you find the default fonts, colours and text size not to your liking you can change all of them as shown below:
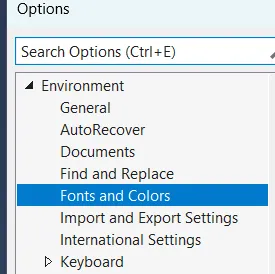
To begin with, select the Fonts and Colors tab on the Options dialog box.
You can change several settings for text in each part of Management Studio.
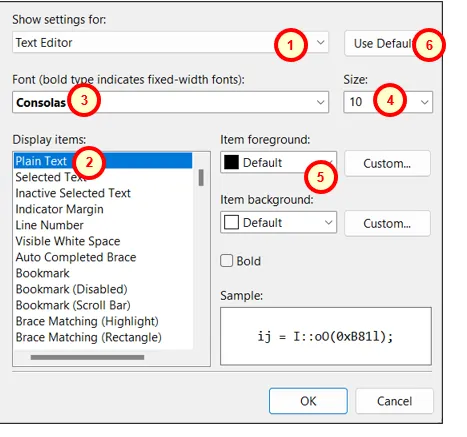
The parts of the dialog box highlight with the numbered circles are described below.
Here's what you can do:
Choose which part of Management Studio you want to change the font settings for. The Text Editor is the area you'll spend most of your time in as it's where you'll write your queries.
Choose which type of text you want to change. The options in this list will change depending on what you've selected in option number 1.
Choose a font from this list. You can write your queries in Comic Sans if you really want to, although you'll land yourself with a lifetime ban from the SQL Query Writers Guild if you do!
The default font size is quite small - change it using this option.
Choose foreground and background colours from these two lists.
If everything goes horribly wrong, click this button to return all the font settings to their default values.
Display Line Numbers
By default you don't see line numbers next to your code when writing queries. You can switch them on quite easily using the Options dialog box.
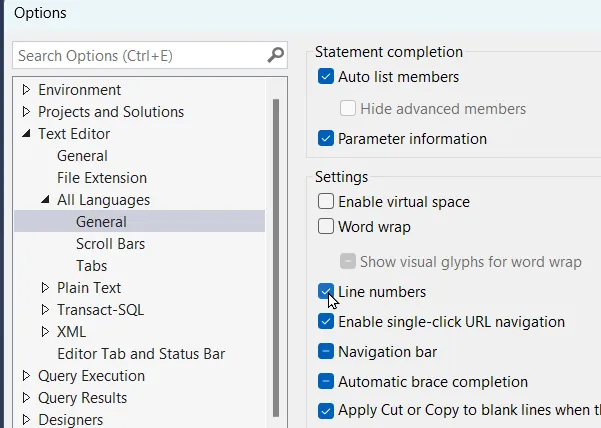
Expand the Text Editor option by clicking on the + symbol to the left of it, then expand All Languages and click on General. Finally, check the box next to the Line numbers option.
Here's what line numbers look like:
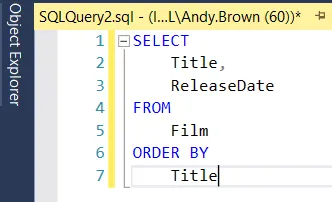
A query with line numbers displayed.
Line numbers are particularly useful when trying to decode error messages.
Autocomplete or IntelliSense
IntelliSense is the name given to a drop down list that appears to help you finish your sentences in SQL.
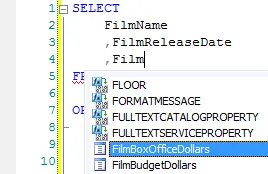
Here we've started typing the word Film and the IntelliSense list appears to show us the matching options. When a word is highlighted in the list you can press the Enter, Tab, space or comma keys (among others) to type it in.
Intellisense is pretty handy (if stupidly-named), but if it annoys you and you'd like to turn it off, you can!
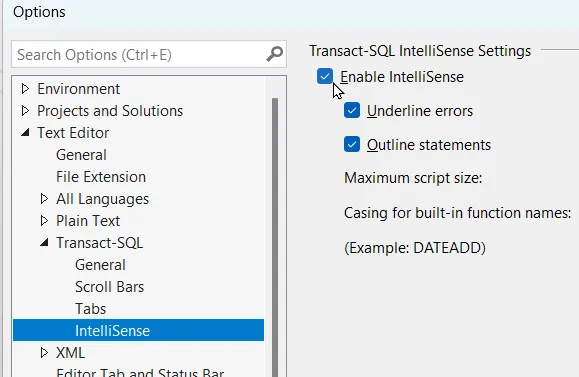
Expand the Text Editor section, then the Transact-SQL section and click on IntelliSense. You can turn the feature off completely by un-checking the Enable IntelliSense.
You can also disable IntelliSense using a different option, as shown below:
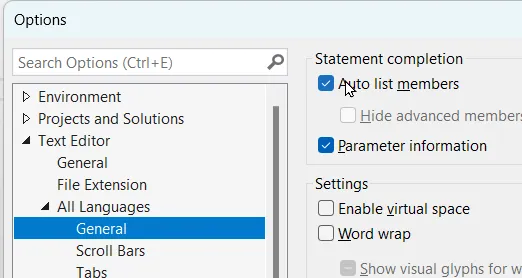
Un-check the Auto list members box shown here to disable IntelliSense in new query windows.
Changes you make to IntelliSense settings will only affect new query windows that you open.
Getting Column Headers when Copying Query Results
If you ever need to copy the results of a query into Excel to format the results you'll want to make sure you get the column headers along with the data. Strangely, the default option is to not include column headers when copying results, so here's how to change it.
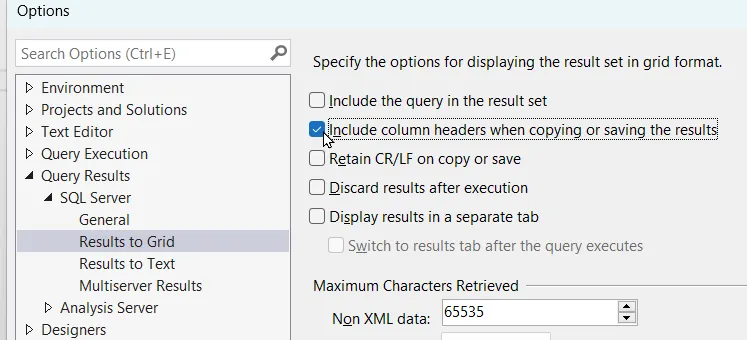
Expand Query Results, then SQL Server and select Results to Grid. Check the box shown here to ensure that you pick up column headers next time you copy results.
You can instead choose to pick up the column headers each time you copy the results of a query.
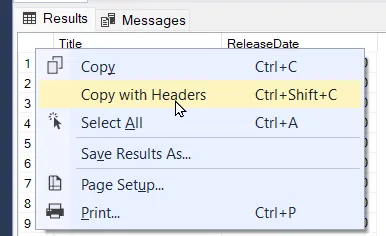
Choose the option shown here to include column headers when you copy the results of a query.
Viewing or Editing all the Records in a Table
When you choose to view or edit the records in a table you can only do so to a limited number of records.
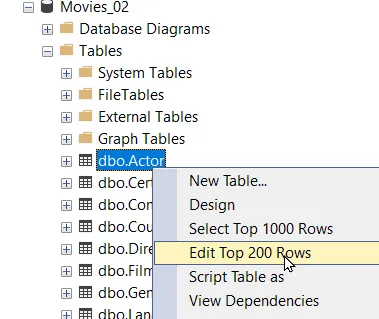
By default, you can only view the first 1000 and edit the top 200 records in a table.
Fortunately, you can change this to allow you to view and edit all the records.
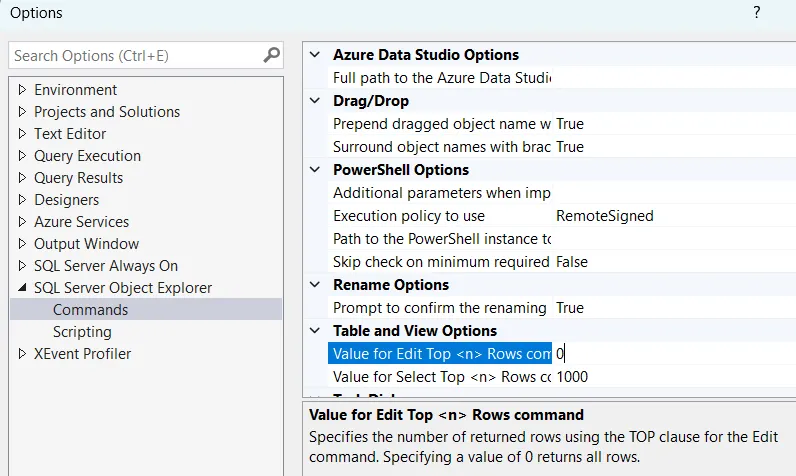
Expand the SQL Server Object Explorer group and click Commands. Change the Table and View Options shown here to any number you like. If you enter a value of 0 you will see all of the records in a table.
Once you've done this you can right-click on a table and view or edit all of the records in a table.
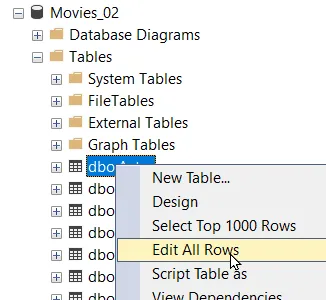
Now you can view or edit an entire table.
These are a few of our favourites that should make your SQL code writing that little bit easier. Let us know if we've missed out your favourite short-cut!


