This blog aims to show how to read the last entry on an Excel sheet and show it on the screen as a message using Power Automate Desktop.
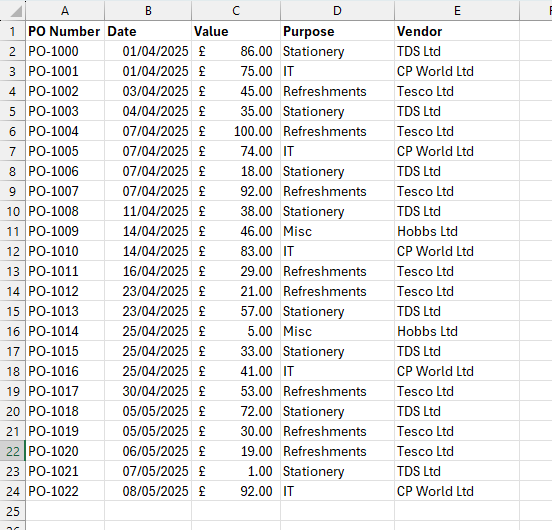
The Excel worksheet I want to read the last row from.
For the purpose of this blog I will refer to Power Automate Desktop by its nickname PAD.
Creating a new flow
When you open PAD you are taken to the home page as below.
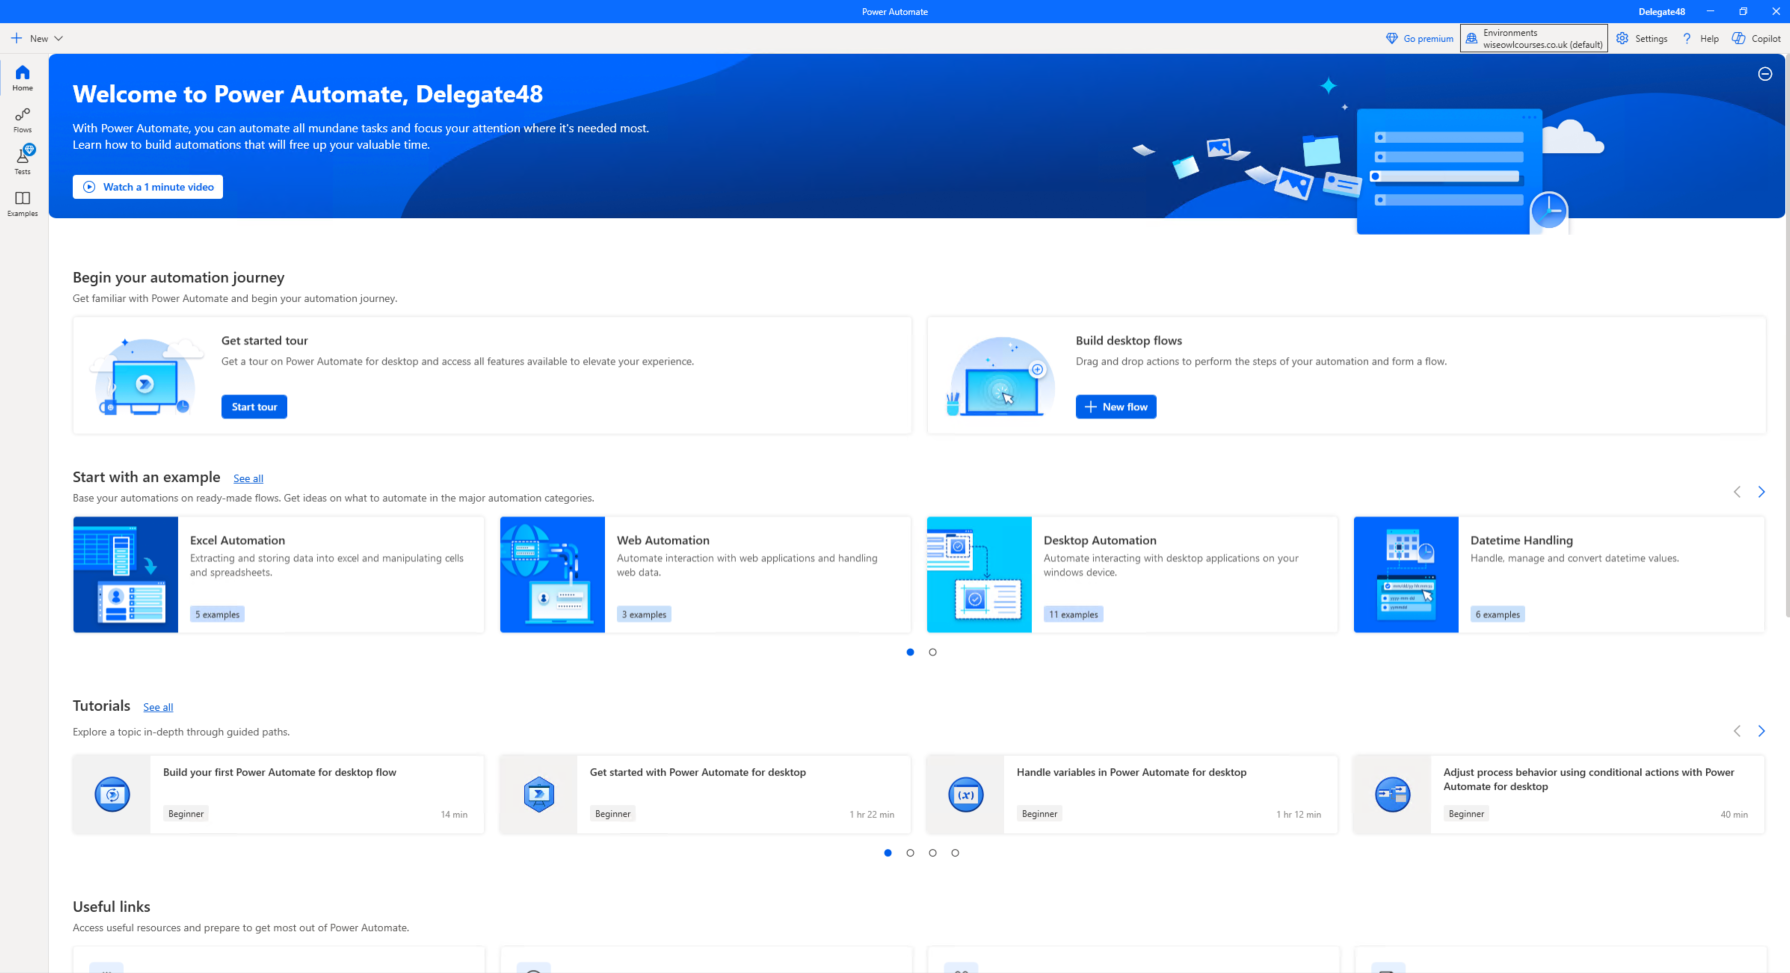
The Power Automate Home screen.
From here you can either select Flows on the left hand menu then choose New Flow or click the + New dropdown and choose Flow.
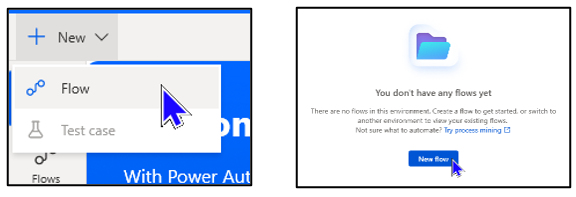
Options for creating a new PAD flow.
You will then need to give your flow a sensible name or accept the auto-generated one.
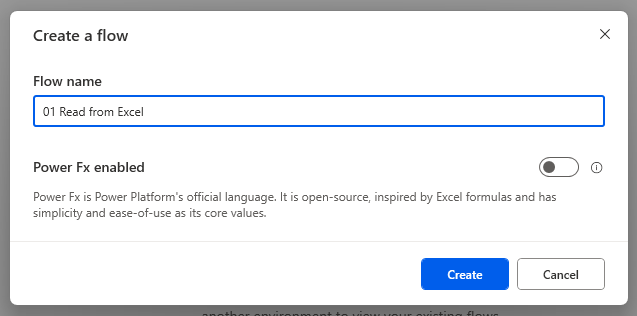
If you don't enter a name the flow will be called Untitled (you can rename it later).
A new window will open with your blank flow and a list of PAD actions on the left.
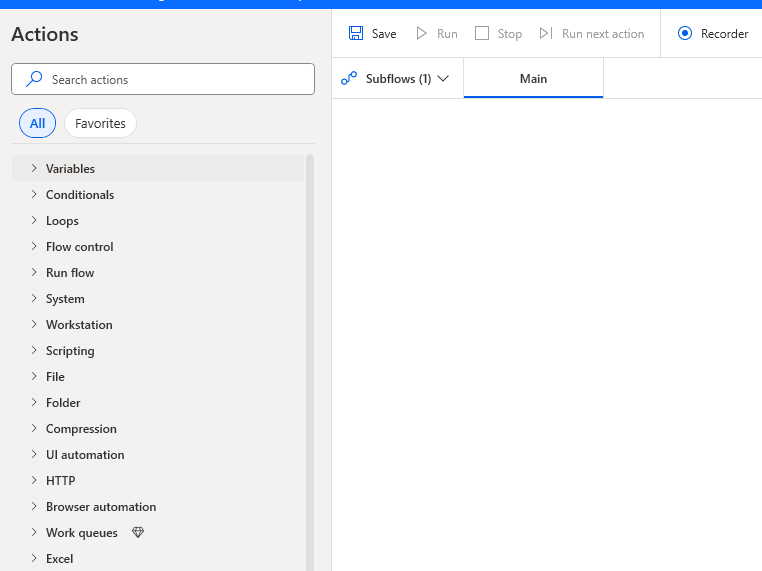
This Owl has never found a discernible pattern to the order in which the actions are listed.
You can consider actions to be steps or instructions that are added like building blocks to create the overall flow.
Adding actions to a flow
Before adding actions it is a good idea to plan what you want to achieve with the flow. Here's a simple diagram to show what I want to achieve:
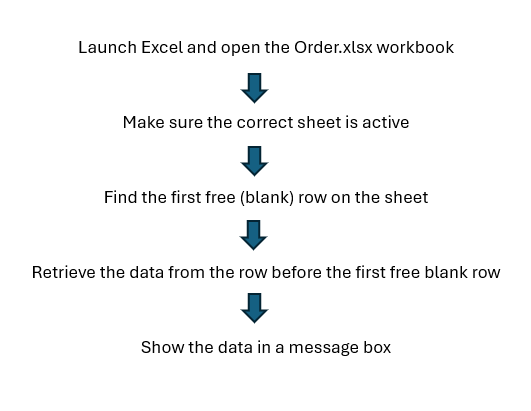
A simple plan like the one above will help you decide what actions you need.
By far the simplest way of finding a specific action is to use the search box and begin typing part of the description of the action you require. Over time you will become more familiar with the names of actions, making searching easier. In the example below, I've searched for actions related to excel:
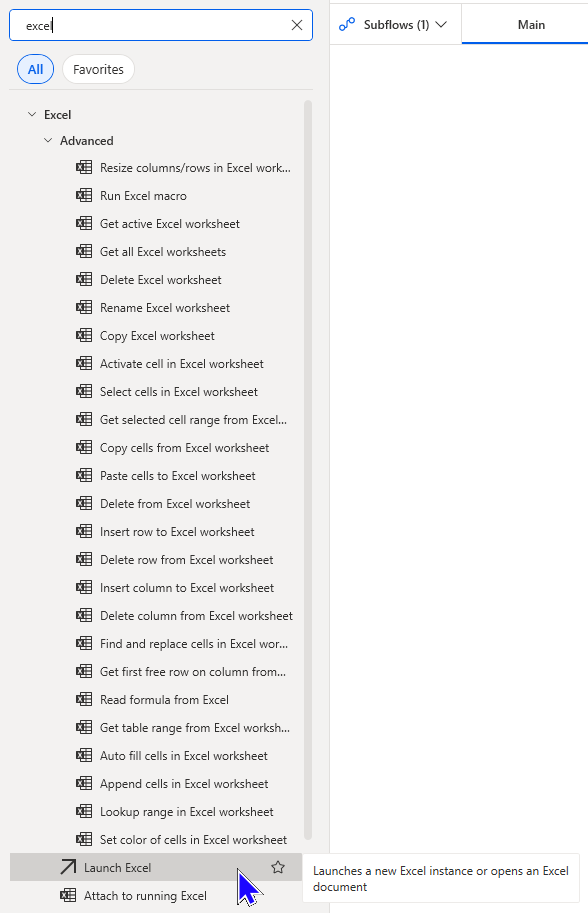
Hovering over an action will give a general description of what the action does.
To add an action to your flow either double click the action or you can drag and drop to the main window.
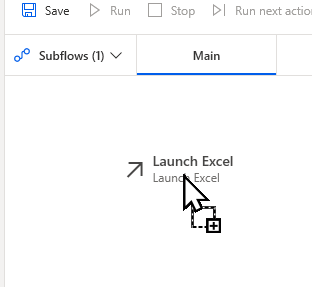
Double clicking an action will add it after the last action in the flow. Drag and drop allows you to place an action anywhere within the flow.
In either case, the action will be added and its associated dialog box will appear.
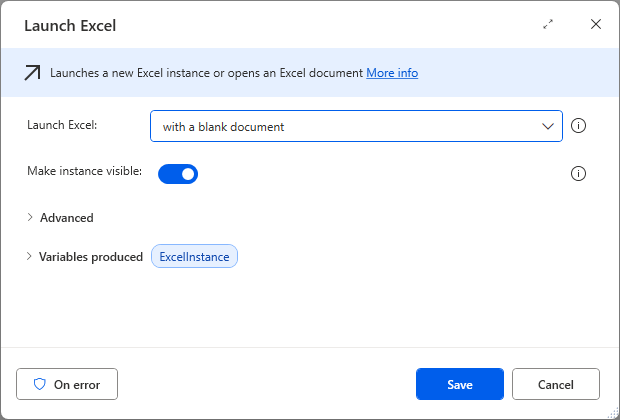
You can choose to either open a blank Excel file or specify a file to open.
I need to open a specific Excel file.
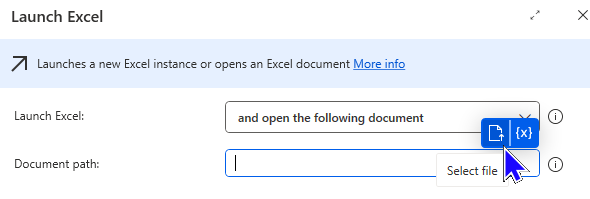
Choosing to open an existing file will then prompt for the file path, click the blue Select file icon as above.
Once I've selected the correct file I can click the Save button to save the action.

The action appears in the main flow window

PAD creates a variable called ExcelInstance to capture a reference to copy of Excel that opens.
Now I need to make sure the correct worksheet is active for me to retrieve the data. I can add a Set active Excel worksheet action to the flow do this.
Configure the new action as shown below, using the variable created by the previous action to refer to the instance of Excel you want to use:
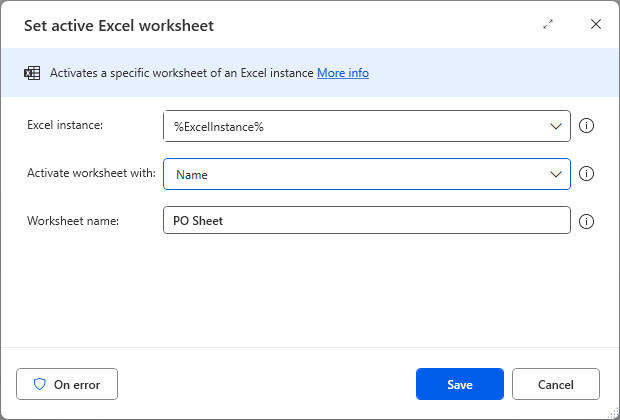
This action is using the Instance of Excel previously opened and is activating the sheet named PO Sheet.
When activating a sheet you can use the sheet name or index number.
Excel sheets are indexed in the order they are displayed left to right starting with the number 1. If the order of sheets changes then so will the corresponding index number.
Using variables in PAD
Now to add the Get first free column/row from Excel worksheet action.

The PAD flow at this point - add the new action below this.
Configure this new action as shown below:
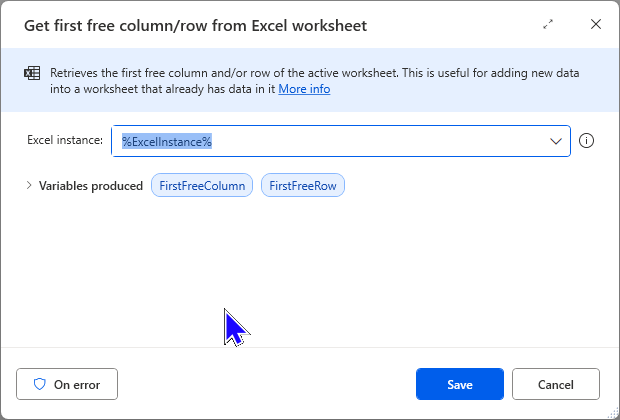
This action produces 2 variables that hold the numbers for the first free row and first free column.
It is advisable to rename variables that you intend to use to a more suitable name. You can right click on a variable and choose Rename to do this.
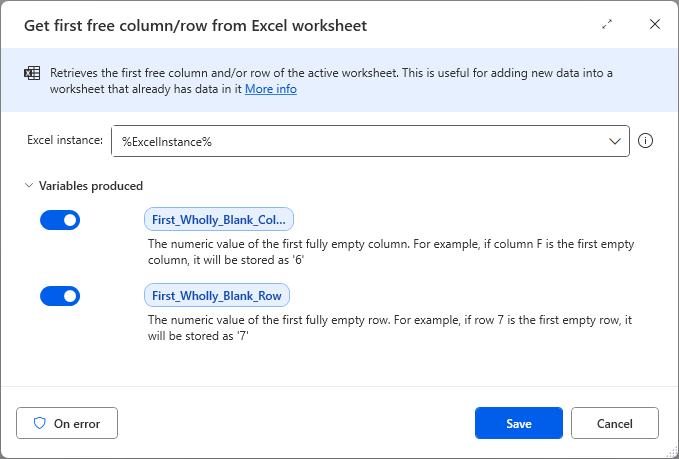
Both variables have been renamed to suitable names, without using spaces.
I now need to retrieve the data from the row above the First_Wholly_Blank_Row number and as far as the the column before the First_Wholly_Blank_Column.
To do this, add a Read from Excel worksheet action to the flow and configure it as shown below:
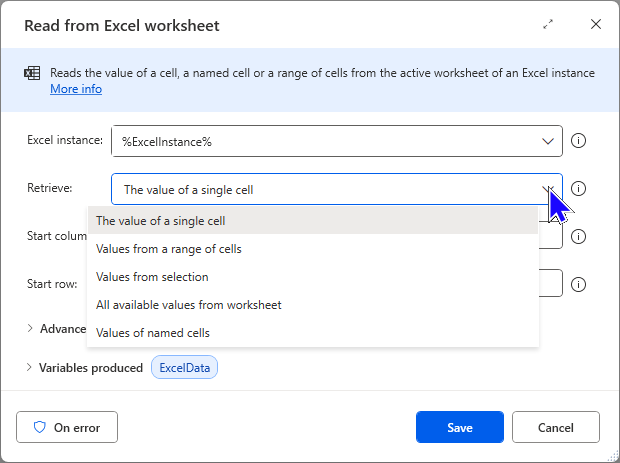
You have a variety of choices when retrieving data from an Excel worksheets.
You can manually enter values for rows and columns or use the values stored in variables.
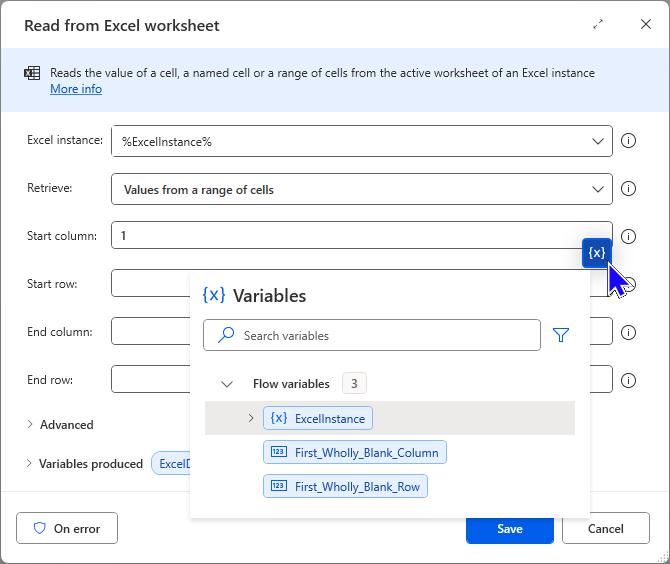
Properties which can be set using variables will show an {x} button when you select them. Clicking this allows you to choose a variable and use its value.

This is what you see when a variable is being used. I want data from the row above this, NOT the blank row.

We can fix this problem by subtracting 1 from the value stored in the variable.
You can perform various calculations on values being stored in variables. The calculation must be contained within the % symbols.
Edit the other properties of the action as shown below:
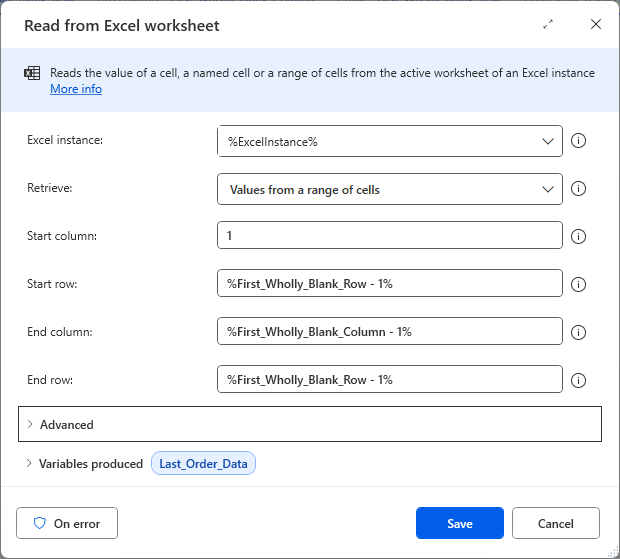
The values set above should return the last row of data from the sheet. I've renamed the variable produced to Last_Order_Data.
Testing the Flow
At this point in the process it is worth checking to see if everything works.

Click Run at the top of the PAD window to execute the flow.
PAD flows will run through the actions in turn until the end is reached or an error occurs but you can Stop or Pause a flow if required.

The Stop and Pause options appear while a PAD flow is running.
When you store rows and columns of data in PAD variables they are stored as a Datatable. You can view these in the Variables pane.
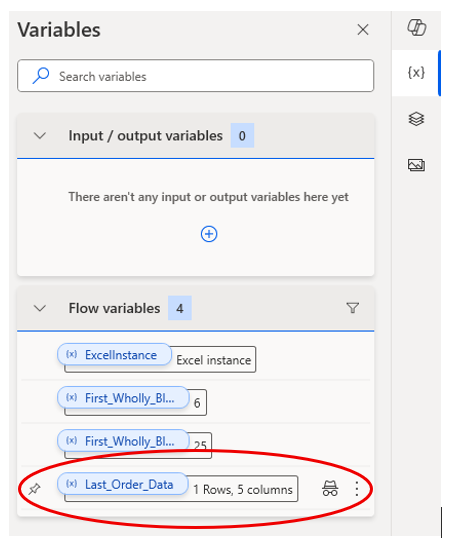
This shows that I have 1 row and 5 columns, read from the Excel worksheet.
To see what is stored in this variable, click the 3 dots to the right of it and choose View.
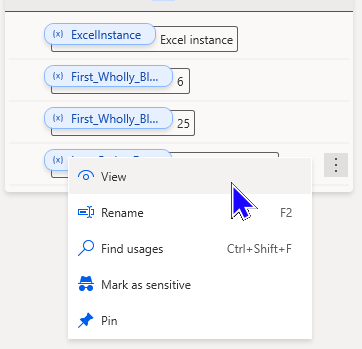
Clicking View will show the Datatable of values stored in it.
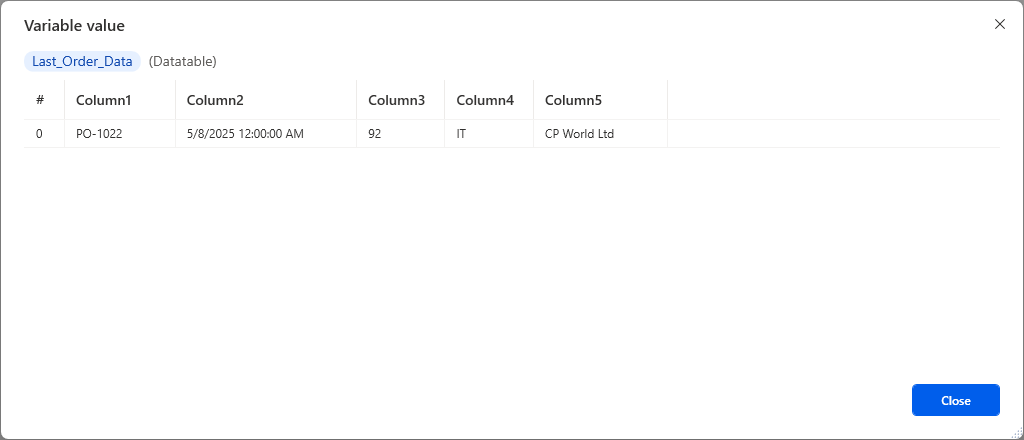
The data read from Excel stored as a Datatable.
In PAD Datatables, rows and columns are indexed. The first row is indexed as 0 as is the first column.
Displaying a message
Now the details are stored in a Datatable I can use them to display a message. To do this, add a Display message action to the flow.
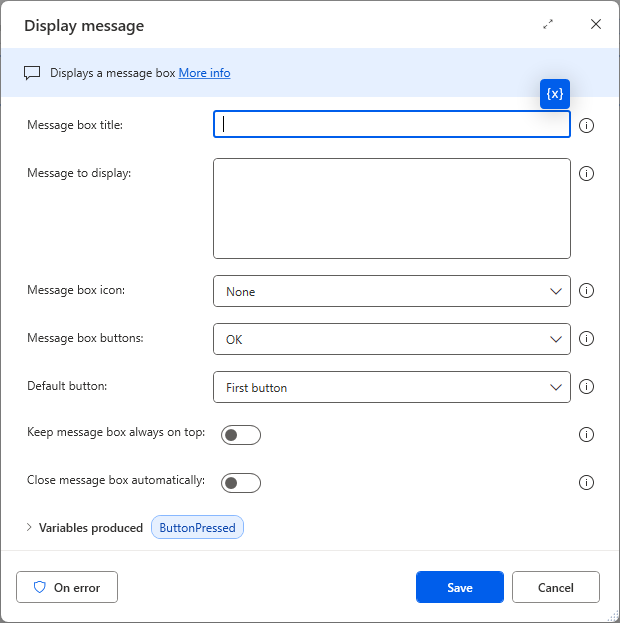
The Display message action can display the value of variables and Datatables.
In the Message to display box you can combine literal text with variables to create the message you want to show.
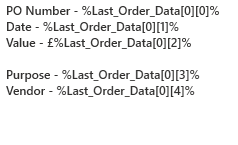
Notice the lack of concatenation characters.
In PAD you can create concatenated strings without the need for a function or special character. You simply type the literal text then use the {x} symbol to add stored values
When referring to the contents of a Datatable as in the example above, you can specify the row and column number of the item of data you wish to display. In the image above, %Purpose - Last_Order_Data[0][3]% will return the value stored in the Datatable at row 0, column 3.
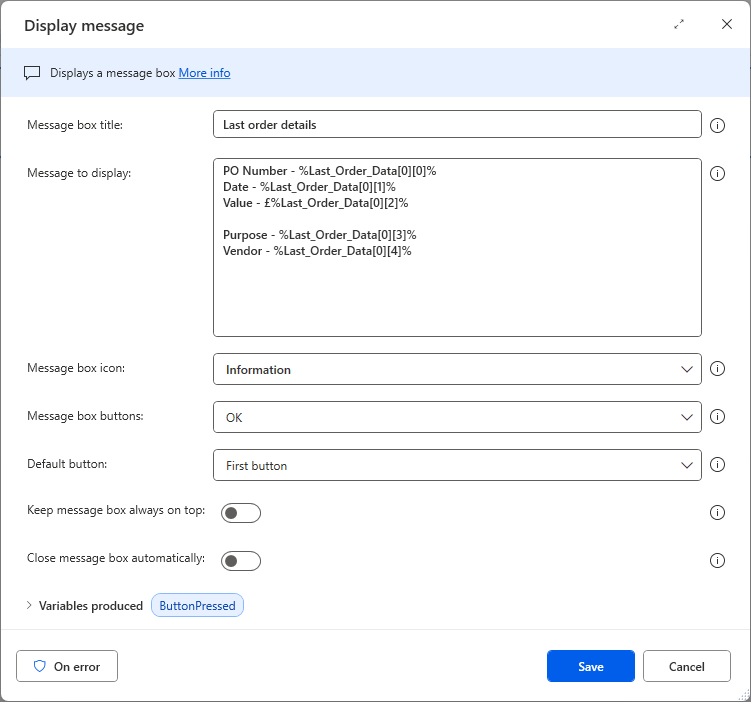
The completed message, including the data stored on the last row we read from Excel.
Closing Excel
The final action will be to close Excel. Add a Close Excel action to the flow.
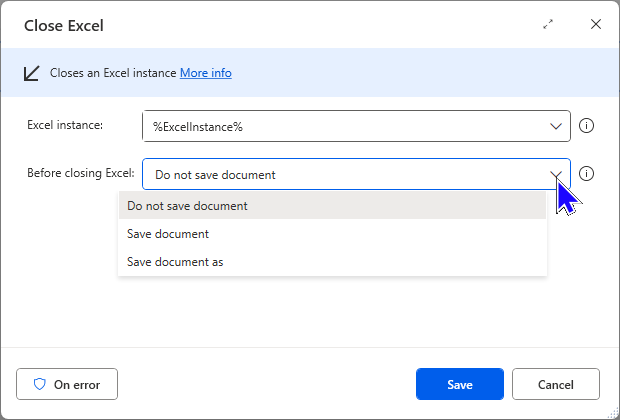
You can choose whether or not to save the workbook.
My flow only reads from the Excel file so no save is required.
Running the finished flow
Here's the complete flow that I've created:
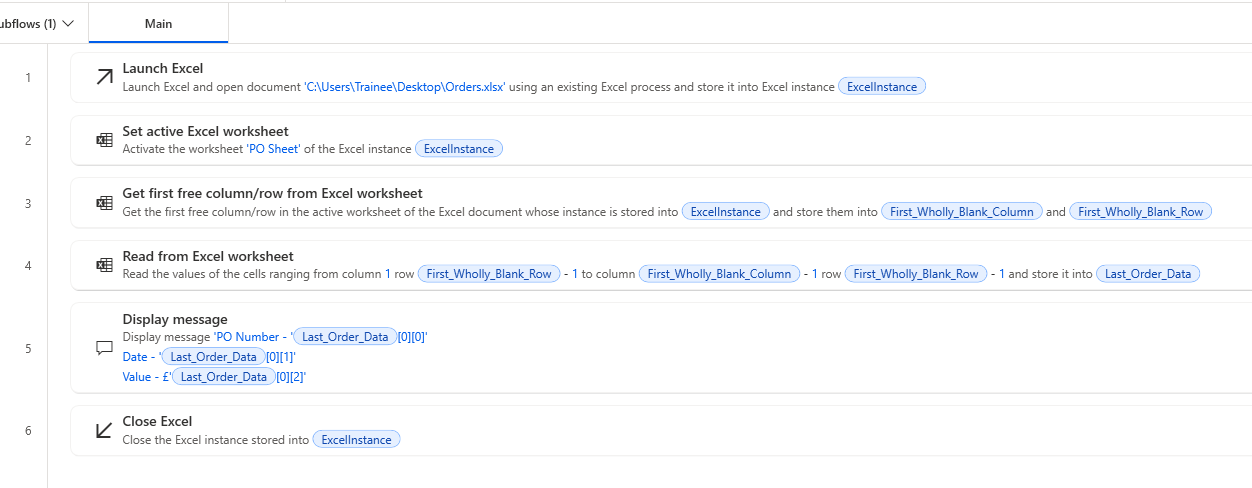
The finished flow, now to test it.
As before, you can run the flow by clicking the Run button at the top of the PAD window.

Here are the details of the last row in the Excel sheet.
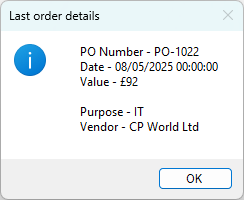
The message displayed after running the flow.
See the other blogs in this series for more simple PAD flows.


