Often in VBA you need to ask someone to choose a file or folder, using a dialog box like this one:
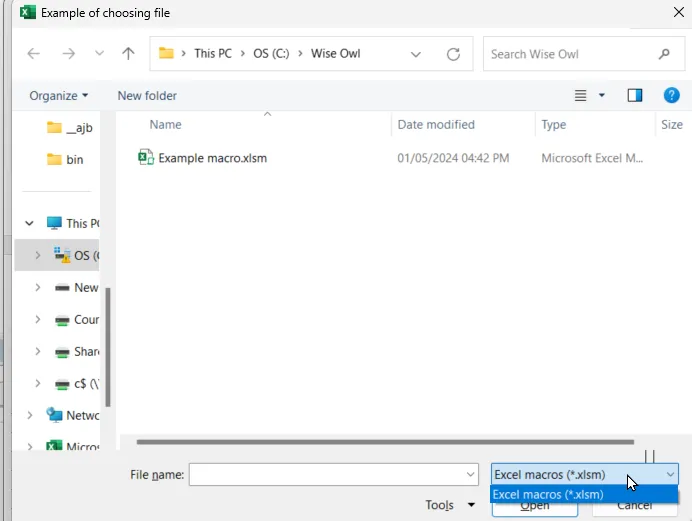
Many parts of this dialog box have been customised.
This tutorial explains how to display a dialog box like this, how to customise it and - most importantly - how to get at the file or files selected.
The Types of File and Folder Dialog Box
There are four possible choices you can make when displaying a file or folder dialog box:
Choice | What it does |
|---|
msoFileDialogFilePicker | Lets users select one or more files |
msoFileDialogFolderPicker | Lets users select a folder path |
msoFileDialogOpen | Lets users select one or more files to open |
msoFileDialogSaveAs | Lets users select a single file to save |
There are actually really only 2 choices. The first, third and fourth options above all display a dialog box for choosing a file; the second displays a dialog box for choosing a folder. In particular, note that just because you're using an msoFileDialogOpen dialog box, for example, doesn't mean that Excel will then open any file you pick (it's still up to you to do that in code).
Displaying a Vanilla File Dialog Box
The basic code to create and display a file dialog box involves applying the FileDialog method to the Application object:
Sub ChooseFile()
Dim fd As FileDialog
Set fd = Application.FileDialog(msoFileDialogFilePicker)
Dim FileChosen As Integer
FileChosen = fd.Show
If FileChosen <> -1 Then
MsgBox "You chose cancel"
Else
MsgBox fd.SelectedItems(1)
End If
End Sub
This would display a basic dialog box. If a user then chose a file, the macro would display its name:
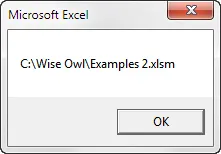
The first element of the SelectedItems array shows the name of the one and only file chosen.
Notice how VBA inconsistently denotes the first item in the array of selected files with the number 1, not 0.
Making a File or Folder Dialog Box Prettier
Now that we've created a basic dialog box, let's look at how to tart it up a bit (a good UK English expression that - wonder how well it travels ...). The diagram below shows that you can change:
The caption of the dialog box (here to Example of choosing file)
The initial folder selected (here to c:\Wise Owl\)
The view of your files (this one is msoFileDialogViewSmallIcons)
The filter used (here we're just looking for Excel macro workbooks)
The text on the Open button (here it's Choose owly file)
Here's the dialog box:
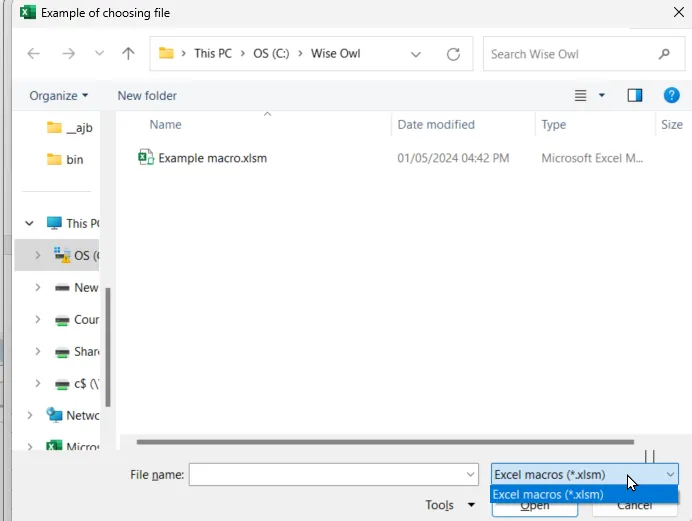
A prettified file dialog box!
Here is the code which would make this work, with comments to explain the various properties set:
Sub ChooseFile()
Dim fd As FileDialog
Set fd = Application.FileDialog(msoFileDialogFilePicker)
Dim FileChosen As Integer
FileChosen = fd.Show
fd.Title = "Example of choosing file"
fd.InitialFileName = "c:\wise owl\"
fd.InitialView = msoFileDialogViewSmallIcons
fd.Filters.Clear
fd.Filters.Add "Excel macros", "*.xlsm"
fd.FilterIndex = 1
fd.ButtonName = "Choose &owly file"
If FileChosen <> -1 Then
MsgBox "You chose cancel"
Else
MsgBox fd.SelectedItems(1)
End If
End Sub
The button name won't appear - oddly - until you've clicked on a file first.
A FileDialog Example - Choosing a File to Open
The following macro would allow you to choose an Excel workbook to open, and then open it:
Sub OpenWorkbook()
Dim fd As FileDialog
Dim FileName As String
Set fd = Application.FileDialog(msoFileDialogOpen)
Dim FileChosen As Integer
FileChosen = fd.Show
fd.Title = "Choose workbook"
fd.InitialFileName = "c:\wise owl\"
fd.InitialView = msoFileDialogViewList
fd.Filters.Clear
fd.Filters.Add "Excel workbooks", "*.xlsx"
fd.Filters.Add "Excel macros", "*.xlsm"
fd.FilterIndex = 1
fd.ButtonName = "Choose this file"
If FileChosen <> -1 Then
MsgBox "No file opened"
Else
FileName = fd.SelectedItems(1)
Workbooks.Open (FileName)
End If
End Sub
Notice that although here we used the msoFileDialogOpen dialog type to choose a workbook, this didn't automatically open it!
The AllowMultiSelect Property
Sometimes you'll want to display a dialog box and allow a user to choose a number of files at the same time. To do this you need to know how to set the AllowMultiSelect property of a dialog box, and deal with the files returned. You can tell Excel to allow multiple file selection as follows:
Sub OpenSeveralFiles()
Dim fd As FileDialog
Dim FileChosen As Integer
Dim FileName As String
Dim i As Integer
Set fd = Application.FileDialog(msoFileDialogFilePicker)
fd.InitialFileName = "c:\wise owl\"
fd.InitialView = msoFileDialogViewList
fd.AllowMultiSelect = True
This automatically means that you can use the CTRL key, SHIFT key and mouse to select multiple files. For example:
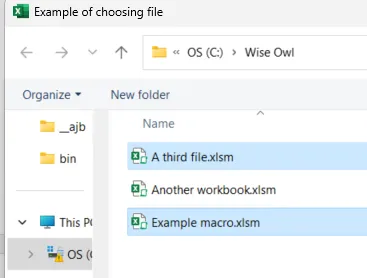
Here we've selected 2 files to open.
Picking Up on the Files Selected
Having chosen some files, you can loop over the SelectedItems array processing each item in it:
FileChosen = fd.Show
If FileChosen = -1 Then
For i = 1 To fd.SelectedItems.Count
Workbooks.Open fd.SelectedItems(i)
Next i
End If
Once again, notice how strange it is that the first item in the array is 1, not 0 as it would be normally.
A Final Thought
This tutorial has shown how to use the file and folder dialog boxes, but you can also get at any of the dialog boxes built into Excel. For example, this code:
Dim fd As Dialog
Dim ButtonChosen As Integer
Set fd = Application.Dialogs(xlDialogFont)
ButtonChosen = fd.Show
If ButtonChosen = -1 Then
End If
would bring up this dialog box!
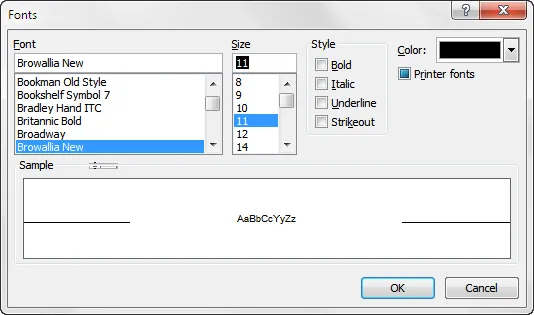
But I'm not quite sure where you'd go from here ...
Food for thought!


