Flappy Bird in Excel VBA - Starting and Ending the Game
Useful Links
Return to the Flappy Bird in Excel VBA Tutorial index.
Download Flappy Owl Pt5 - Start Stop Buttons.
Introduction
This part of the tutorial will show you how to give the player a way to start
and stop the game using simple buttons. If you'd prefer not to type out the code
yourself you can download a working version of the workbook from the link above.
Creating Buttons to Start and Stop the Game
This task is relatively straightforward and you may well have created buttons to run your VBA macros already. To do this, head into Excel and insert a new
worksheet called Menu. Next, go to the Developer
tab in the ribbon, click the Insert tool and find the
Command Button tool in the ActiveX Controls section of
the list:
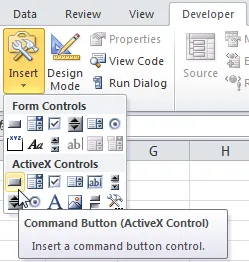
Use
an ActiveX Command Button , not the
Form Controls version.
If you're working in Excel 2003 you'll need to display another toolbar to get
access to these tools. From the menu choose View | Toolbars | Control
Toolbox
Once you've selected the Command Button tool simply click
somewhere on the worksheet to draw the button.
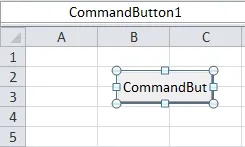
This should be the end result of drawing the button on the worksheet.
We'll use this button to start the game, we also need one to stop it. Head to
the Test sheet and draw another button in the same way.
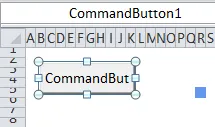
Make sure that this button is out of the way of the bird's flight path.
You should notice that when you've drawn an ActiveX control on the worksheet
Excel automatically enters Design Mode.
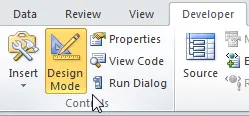
Design Mode is activated automatically when you add an ActiveX control to a sheet.
In design mode, when you click on a button on the worksheet the button is
selected. You can turn off design mode by clicking the tool on the ribbon. If
you do that, clicking on the button on the worksheet will fire that button's
click event. We'll stay in design mode for now as we want to change a few
properties of our button.
Changing Button Properties
The reason we've used ActiveX buttons rather than basic Form buttons isn't
simply because ActiveX buttons sound cooler. This type of button can be
controlled in a much more detailed way than a standard Form button, both in code
and by manually editing its properties.
To change the properties of a control you'll need to view the
Properties window. Right-click on the button that you added to the
Test sheet and choose Properties.
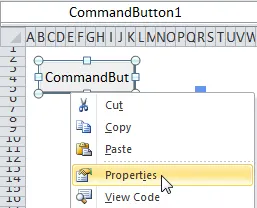
Right-click the button and choose this option.
In the Properties window, change the (Name)
property to cmdStopGame and the Caption to
Stop Game.
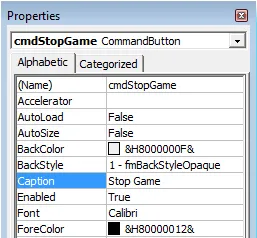
There are lots of properties for changing the appearance of the button too. We'll worry about making our buttons look pretty later on.
Now go back to the button on the Menu sheet and change its name
and caption to cmdStartGame and Start Game
respectively.
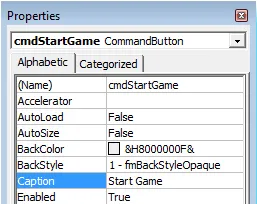
Again, just change two properties for now.
When you've finished changing properties you can close the window by clicking
the cross in the top right hand corner of the window.
Adding Code to Buttons
Now we need to make the buttons do something when a player clicks on them.
Right-click on the cmdStartGame button and choose View
Code.
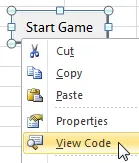
Choosing this option will take you back to the VB Editor.
You'll be taken back to the VB Editor, viewing the code page
for the Menu sheet with a system-generated
event procedure for the click event of the button.

This is what you should see.
Before we write any code we should change the code name of the Menu
sheet. If you closed the Properties window in Excel
you'll probably notice that it's also disappeared in the VB Editor. To
bring it back just press F4 then change the name
of the sheet to shMenu. You may need to exit design mode in
order to see the properties of the sheet rather than the properties of the
command button. You can exit design mode from the VB Editor by clicking the tool
shown below:
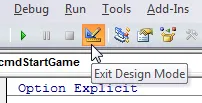
Click this tool to exit design mode.
Now add a single line of code to the procedure for the click event of the
button. The final result should look like this:
Option Explicit
Private Sub cmdStartGame_Click()
InitialiseGame
End Sub
Now we'll add code for the button which stops the game. You don't need to go
back to Excel to do this, we can get to the click event procedure from the VB
Editor. Start by double-clicking the shTest sheet object in the
Project Explorer window.
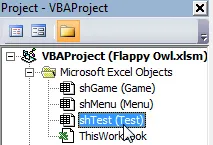
Double-click this object.
At the top of the code page which appears click the drop down menu on the left
and select the cmdStopGame option.
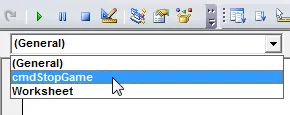
Select this option.
This will generate the default event procedure for the button, which is exactly
what we want. If you wanted to see which other events a button has you can use
the drop down list at the top right of the code page.
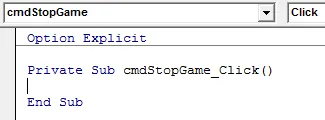
This is the event procedure that will be generated.
Now add two lines of code to the procedure to stop the game and go back to the
Menu sheet.
Option Explicit
Private Sub cmdStopGame_Click()
TerminateGame
shMenu.Select
End Sub
Testing the Game
Now we're ready to see if we can start and stop the game successfully. Before
we do that, go back into Excel and select the Test sheet. Make
sure that you've exited design mode and that you don't still have the button
selected.
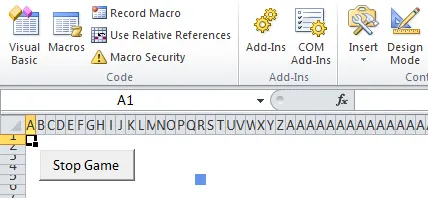
Make sure
Design Mode is turned off and that you have a cell selected rather than the button.
Now head to the Menu sheet, click on a cell and save the
workbook! You should find that you can now click the button to start the game
and click the other button to stop it again.
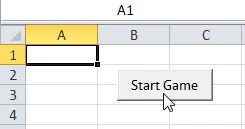
Click here to start the game.
It's not a very exciting game yet, but hopefully you can at least see it running
. If something went wrong you could either attempt to find the problem by going
back through all of your code, or you could download a working version from the
link at the top of the page.
What's Next
Now that we can start and stop the game we need to provide a way for the
player to give the game some input. In the next part of the tutorial we'll look
at how to detect key presses to make the bird flap.


