Read our blogs, tips and tutorials
Try our exercises or test your skills
Watch our tutorial videos or shorts
Take a self-paced course
Read our recent newsletters
License our courseware
Book expert consultancy
Buy our publications
Get help in using our site
560 attributed reviews in the last 3 years
Refreshingly small course sizes
Outstandingly good courseware
Whizzy online classrooms
Wise Owl trainers only (no freelancers)
Almost no cancellations
We have genuine integrity
We invoice after training
Review 30+ years of Wise Owl
View our top 100 clients
Search our website
We also send out useful tips in a monthly email newsletter ...
Should you be using QT for Python as a GUI? Part five of an eight-part series of blogs |
---|
If you need to build a GUI system in Python, PyQt5 is probably the best choice, but don't take our word for it - read this blog and see what you think.
|
When you've created a form in QT Designer, there are four ways in which you can view it in Python code.
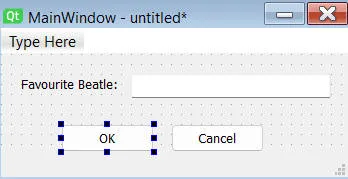
I'll use this simple form as an example in the first 3 cases below.
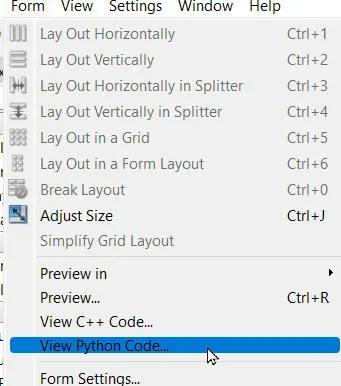
If you want to see the code being written on your behalf by the QT bot, choose this option:
You can see either C++ or (as here) Python code.
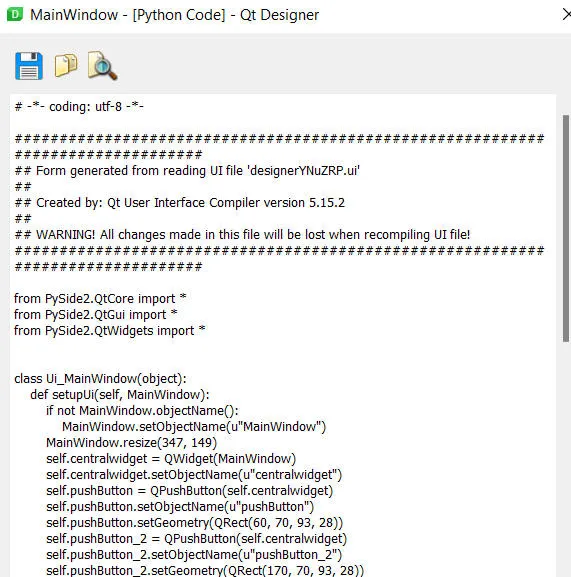
Here's the start of the code generated for our form:
The first part of the code automatically generated to create this form.
A second approach is to save your form as a file with .ui extension:
Here we've called our form file basic_form.ui.
You can now run a pyuic5 command to generate the Python code corresponding to this form:
This will turn our form into a Python code file.
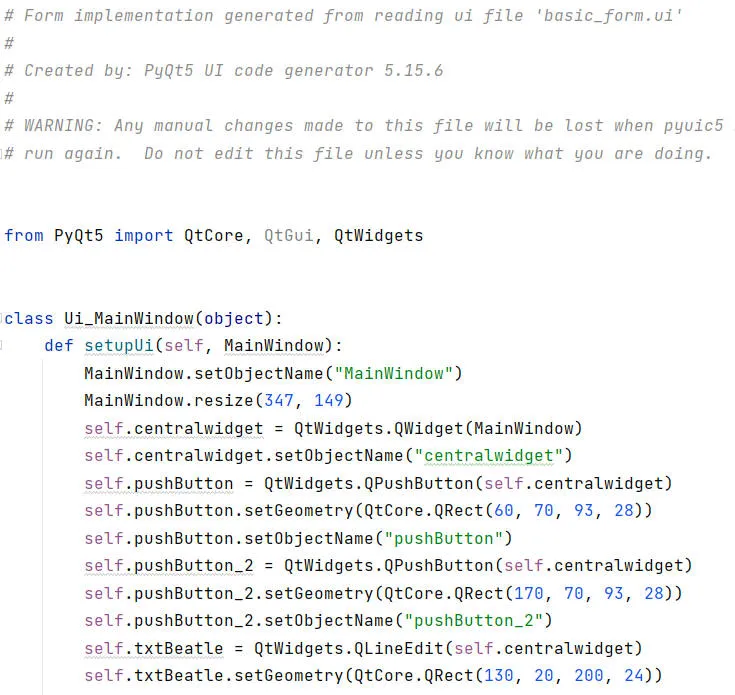
Here's the start of the code generated:
The start of the code generated by the pyuic utility.
The only disadvantage of this method is that every time you change the form you will need to regenerate the code file (unless you can set up some sort of listener to do this automatically for you).
This is my preferred method, although it does have its own disadvantages (which I'll address in a moment). In the following code, we create a new form which begins by running all of the code generated from the basic_form.ui file:
from PyQt5.QtWidgets import *
from PyQt5 import uic # type: ignore
class MainWindow(QMainWindow):
# called when create new instance of our class based on a QT main window
def __init__(self):
# calls constructor for base class
super().__init__()
# get Python for form from QT Designer generated UI file
uic.loadUi("basic_form.ui", self)
# create a QT5 app, add a visible window to it and start event loop
app = QApplication([])
window = MainWindow()
window.show()
app.exec()
This line of code uses the imported uic module to generate the Python commands to generate our form:
# get Python for form from QT Designer generated UI file
uic.loadUi("basic_form.ui", self)
The big advantage of this is that it's dynamic - it will always pick up the latest version of your form. The disadvantage is that it makes it harder to refer to widgets on the form, but here's a workaround:
By creating a variable within the window class with the same name as the widget we can get at the widget's methods and properties. I couldn't get Intellisense like this to appear in Visual Studio Code, which is what made me switch to PyCharm as an editor.
This means that for every widget which you want to reference in your code you will need to add a line like the one above. You'll also run into problems if you then rename your widgets in QT Designer (you'll have to change the variable names in your code too). Despite all this, for me the advantages of being able to use QT Designer and see changes made instantly outweigh these disadvantages.
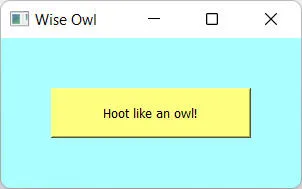
Techie developers may prefer to sacrifice QT Designer altogether, and do everything in code. For example, suppose that you want to show this simple form, containing a single push button:
The form has a title, and both the form and push button have non-standard background colours.
Here's a program to do this:
from PyQt5.QtWidgets import *
from PyQt5.QtCore import *
class MainWindow(QMainWindow):
def __init__(self):
# calls constructor for base class
super().__init__()
self.resize(300, 150)
self.setStyleSheet(u"background-color: rgb(170, 255, 255);")
self.setWindowTitle("Wise Owl")
# add one button
self.pushButton = QPushButton(self)
self.pushButton.setGeometry(QRect(50, 50, 200, 50))
self.pushButton.setStyleSheet(u"background-color: rgb(255, 255, 127);")
self.pushButton.setObjectName("pushButton")
self.pushButton.setText("Hoot like an owl!")
# create a QT5 app, add a visible window to it and start event loop
app = QApplication([])
window = MainWindow()
window.show()
app.exec()
There are two obvious disadvantages to this approach:
Ultimately this comes down to personal preference. For me, being able to change widgets graphically is important, so I'll stick with method 3 for now.
Parts of this blog |
---|
|
Some other pages relevant to the above blogs include:
Kingsmoor House
Railway Street
GLOSSOP
SK13 2AA
Landmark Offices
99 Bishopsgate
LONDON
EC2M 3XD
Holiday Inn
25 Aytoun Street
MANCHESTER
M1 3AE
© Wise Owl Business Solutions Ltd 2024. All Rights Reserved.