Read our blogs, tips and tutorials
Try our exercises or test your skills
Watch our tutorial videos or shorts
Take a self-paced course
Read our recent newsletters
License our courseware
Book expert consultancy
Buy our publications
Get help in using our site
547 attributed reviews in the last 3 years
Refreshingly small course sizes
Outstandingly good courseware
Whizzy online classrooms
Wise Owl trainers only (no freelancers)
Almost no cancellations
We have genuine integrity
We invoice after training
Review 30+ years of Wise Owl
View our top 100 clients
Search our website
We also send out useful tips in a monthly email newsletter ...
Using Styles in Microsoft Excel Part two of a two-part series of blogs |
---|
Constantly formatting cells in the same way can be one of the most tedious and time-consuming tasks in Excel. This blog teaches you how to use styles so that you can quickly apply consistent formatting across a range of cells.
|
It's very easy to apply an existing style to cells, but the choices you have in terms of different styles is somewhat limited. Fortunately you can create your own custom styles.
There are two main ways of creating a style in Excel: you can either format a cell first and then create a style based on that cell; or you can create a style and set all the formatting options using a dialog box.
To create a style based on a formatted cell:
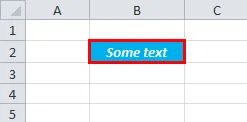
Select a cell and apply all of the formatting options you want to be saved in the style.
It's a bit gaudy but will do as an example. You don't need to type text into the cell, but it helps you to see if you have applied the font formatting that you intended.
Select the cell you have formatted and from the ribbon select: Home -> Cell Styles -> New Cell Style...
If your styles list is expanded like this one you'll need to click the drop arrow at the bottom right corner.
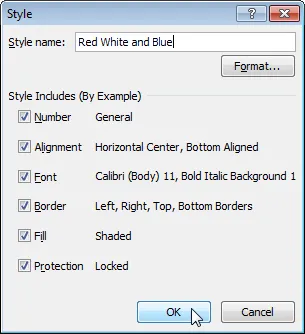
Type in a name for the style and then click OK.
Try to make your style names descriptive.
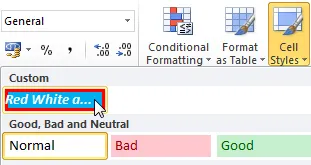
Your style will now be available in the list.
Custom styles will appear at the top of the list of styles.
To create a style without formatting a cell first:
From the ribbon select: Home -> Cell Styles -> New Cell Style...
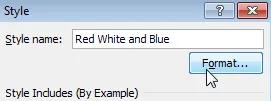
Type in a name for the style and then click Format...
Click the Format... button to display the Format Cells dialog box.
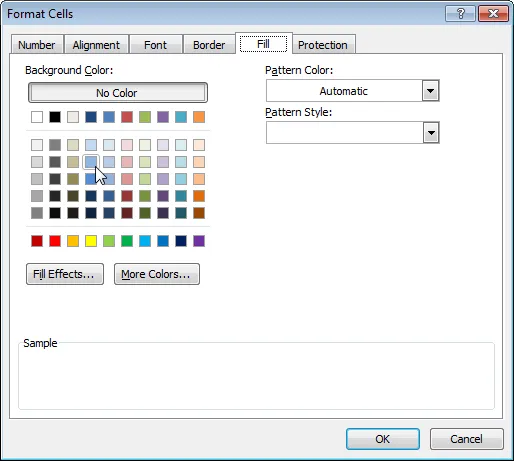
Using the dialog box, apply all of the formatting options you want to be saved in the style and then click OK.
Use the different tabs to change different parts of the cell format.
Click OK once more to create your style.
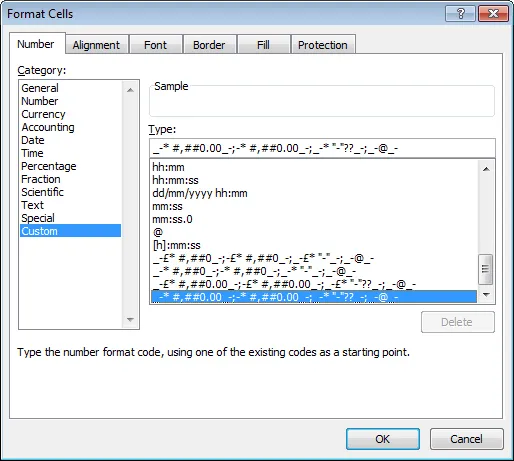
One of the great things about a style is that it can save information about any settings you've applied to a cell using the Format Cells dialog box. So that includes everything from the font size to the cell's protection settings
Anything you change on any tab of this dialog box can be saved in a style. This includes complex custom number formats, which can be a pain to reproduce!
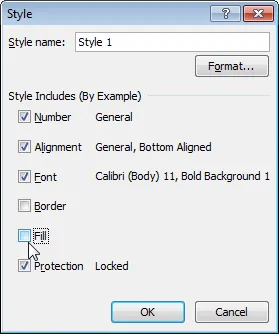
When you create (or modify) a style you can choose which elements of the cell's format you want to include in the style.
Here we've unchecked the Border and Fill elements of the style. This means that when we apply this style to another cell it won't change that cell's border or fill colour settings.
If you decide that you need to change something about a style after you've created it, you can!
To modify a style:
From the ribbon select: Home -> Cell Styles
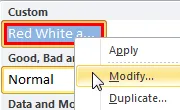
Find the style you want to modify, right-click on it and choose Modify...
Right-click on the style and choose Modify...
On the dialog box, click the Format button to open the Format Cells dialog box. Make any formatting changes that you want to make and then click OK and then OK again.
When you've finished modifying your style you'll see that any cells that already use the style you've changed will automatically be updated to include your changes. It's a great way to change the formatting of a large range of cells in one go.
You can also modify any of the existing styles in a workbook. If you do this with the Normal style you'll find that all of the cells in a new workbook will be changed - that's because every cell in a new workbook has the Normal style applied to it by default.
One slightly disappointing things about styles is that they only exist in the workbook that you create them in. You can get around this by merging styles from one workbook to another.
To merge styles:
Open the workbook that contains the styles you want to use.
Open or create a workbook that you want to copy the styles to and make sure that you have this file selected before the next step.
From the ribbon select: Home -> Cell Styles _> Merge Styles...
On the dialog box which appears, select the name of the workbook that contains the styles you want to copy and then click OK.
On the next dialog box, click Yes if you want to replace any styles that have the same name (such as the Normal style), or click No if you only want to copy the unique styles from the other workbook.
You should now have access to all of the styles from your other workbook. It's annoying to have to do this each time you create a new file - a much better solution would be to create a template workbook which contains all the styles you're going to use regularly, but that's a subject for a future blog!
Parts of this blog |
---|
|
Some other pages relevant to the above blogs include:
Kingsmoor House
Railway Street
GLOSSOP
SK13 2AA
Landmark Offices
99 Bishopsgate
LONDON
EC2M 3XD
Holiday Inn
25 Aytoun Street
MANCHESTER
M1 3AE
© Wise Owl Business Solutions Ltd 2024. All Rights Reserved.