Flappy Bird in Excel VBA - Creating Obstacles
Useful Links
Return to the Flappy Bird in Excel VBA Tutorial index.
Download Flappy Owl Pt10a - Wall Image.
Download Flappy Owl Pt10b - Wall Class.
Download Flappy Owl Pt10c - Moving Walls.
Introduction
This part of the tutorial shows you how to create the image for the obstacles
and how to incorporate them into the game using another class module. We won't
make the obstacles collide with the bird just yet but we will make them move
across the screen from right to left.
How the Obstacles Will Work
In the finished game I'd like the obstacle to look like a brick wall with a
gap which the bird can fly through. If we created a single image containing a
gap in the same place it would make the game quite boring and predictable. I
don't want to have to draw lots of different images for the obstacle with the
gap in different positions either as this represents a lot of work. Instead,
we'll draw a single image representing a solid brick wall and write code to
create a top and bottom half each time a new obstacle is created. The height of
each half can be set randomly for each new obstacle making the game a little
less predictable and more challenging.
Perhaps the single, major controversy from the original Flappy Bird game
surrounded the image used for the game's obstacles. The green pipes were
apparently so similar to those used in Nintendo's Mario series that there was a
rumour that Nintendo applied legal pressure to have the game removed from sale.
This rumour was
denied by Nintendo but to avoid any possible recriminations we'll draw
obstacles which look completely different!
Drawing the Wall Image
We'll draw the wall image in a similar way to drawing the bird image earlier.
If you don't want to bother doing this yourself just download the finished
example from the top of the page.
Head back to the Sprites worksheet in Excel and choose a
starting position for drawing the wall. In this game the wall is going to be 40
cells wide but the height will vary each time a new obstacle is created. We
simply need to make sure the height of the image is sufficient to deal with the
maximum obstacle height that could be created. The default height of our game
area is set to 200 rows so, as the obstacle will never occupy the full height of
the game, we could get away with creating an image somewhat smaller than this.
At this point we're not sure if we'll increase the size of the game area at a
later stage so we'll make sure the obstacle image is taller than it really needs
to be.
Start by drawing a top border in the same garish colour which surrounds the
bird image. Make this top border 42 columns wide.
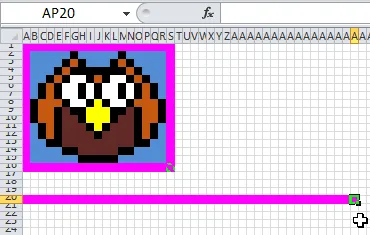
I've drawn my border from cell
A20 to cell AP20.
Next, add a left and right border in the same colour with a height of 10 rows.
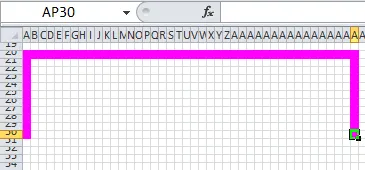
The left border is range
A21:A30 and the right border is range
AP21:AP30.
Next, draw a black outline for the first two rows of bricks as shown below:
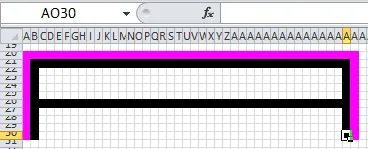
Each line of bricks should have four blank rows ready to be coloured in.
Now you need to choose a colour for the bricks and change the fill colour of
those blank rows. Here are the RGB values for the brick-red colour I'm using:
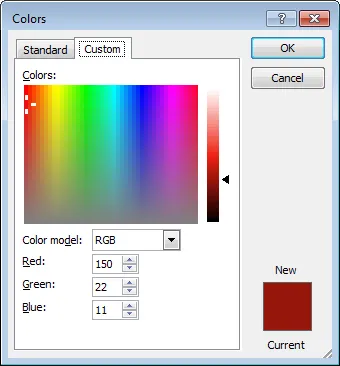
You don't need to choose exactly the same colour as me.
When you've coloured in the rows the image should look like this:
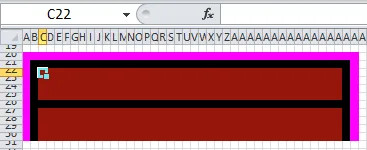
It's starting to look more wall-like.
Now we'll divide the top row into individual bricks, each of which will be 8
columns wide. Draw the black outlines as show here:
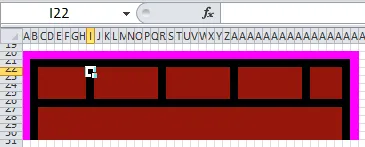
The first brick is actually only 6 columns wide. This allows us to overlap the bricks on different rows.
Next, we'll apply some highlighting and shading to the individual bricks. The
colours I've used are defined as follows:
- Highlight: Red = 182; Green = 149; Blue = 132
- Shading: Red = 72; Green = 0; Blue = 0
The end result of applying these colours should resemble this:
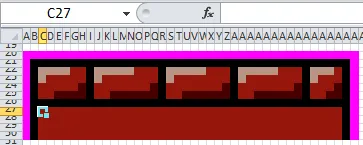
Hopefully when the game runs the image will move too quickly for the player to notice how bad it looks.
With the judicious use of copy and paste you should be able to do something
similar for the second row of bricks:
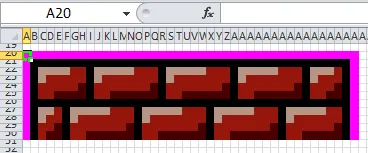
That's two rows of bricks created.
Now that we have two complete rows of bricks we can finish the image by mainly
copying and pasting. Start by copying cells A21:AP30.
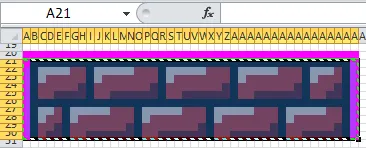
Don't copy the top border.
Now start pasting the copied cells to build up the image.
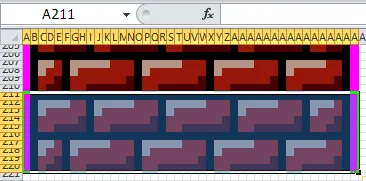
It's tedious but still easier than building an actual brick wall. The final cell that I pasted into was
A211.
Now we can add the black and pink bottom borders manually so that the bottom of
the image looks like this:
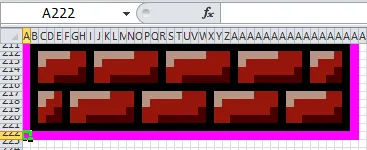
The completed image.
All that remains is to give the cells a range name. Start by selecting the
entire image except for the bright pink borders. Now click into the name box at
the top left of the worksheet and call the range WallImage.
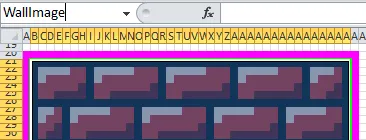
Don't forget to hit Enter to create the range name.
Creating the Wall Class
Now that the image has been created we can create a class module which uses
it to create our game obstacles. Insert a new class module and rename it in the
usual way.
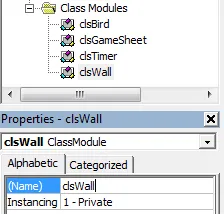
Rename the module as
clsWall.
Declare the following items at the top of the module:
Option Explicit
Private pGameSheet As clsGameSheet
Private WallImage As Range
Private WallTopImage As Range
Private WallBottomImage As Range
Private WallTopCell As Range
Private WallBottomCell As Range
Private WallTopPreviousRectangle As Range
Private WallBottomPreviousRectangle As Range
Private WallTopHeight As Integer
Private WallBottomHeight As Integer
Private WallMinHeight As Integer
Private WallMaxHeight As Integer
Private WallWidth As Integer
Private WallGap As Integer
Private WallMoveRate As Integer
When we create a new instance of this class it will need to know several
properties of the game sheet in order to create the obstacle in the correct
place. We could deal with this in the same way we did for the bird class; by
creating a property in the class to which we could assign a reference to the
current game sheet. However, in this case we'll approach the problem in a
different way; we'll create our own initialise method in the class which can
accept a reference to an object of the game sheet class.
Add the following subroutine to the module:
Public Sub Initialise(GameSheet As clsGameSheet)
Set pGameSheet = GameSheet
Set WallImage = shSprites.Range("WallImage")
WallWidth = WallImage.Columns.Count
WallMoveRate = -16
WallGap = Int(pGameSheet.GameHeight * 0.25)
WallMinHeight = Int(pGameSheet.GameHeight * 0.1)
WallMaxHeight = pGameSheet.GameHeight - (WallGap + WallMinHeight)
End Sub
Generating Walls with Random Heights
At this stage we need to create a new wall on the game sheet with a randomly
calculated height. As we'll need to do this each time a new wall gets created it
makes sense to create a separate procedure to do this. Add the following helper
method to the module:
Private Sub CreateNewWall()
WallTopHeight = _
WorksheetFunction.RandBetween(WallMinHeight, WallMaxHeight)
WallBottomHeight = _
pGameSheet.GameHeight - (WallTopHeight + WallGap)
Set WallTopImage = _
Range( _
WallImage.Cells((WallImage.Rows.Count - WallTopHeight) + 1, 1), _
WallImage.Cells(WallImage.Rows.Count, WallWidth))
Set WallBottomImage = _
Range( _
WallImage.Cells(1, 1), _
WallImage.Cells(WallBottomHeight, WallWidth))
Set WallTopCell = _
pGameSheet.GameRange. _
Cells(1, pGameSheet.GameWidth). _
Offset(0, -(WallWidth - 1))
Set WallBottomCell = _
WallTopCell.Offset(WallTopHeight + WallGap)
End Sub
Now go back to the Initialise subroutine we started earlier
and add a call to the CreateNewWall procedure below the
relevant comment. We'll also add two lines to draw the top and bottom wall in
the correct positions. The end of the Initialise subroutine
should look like this:
CreateNewWall
WallTopImage.Copy WallTopCell
WallBottomImage.Copy WallBottomCell
End Sub
Testing the Basic Wall Class
Although the walls don't move across the screen yet it's still worth testing
that the code to generate them is working correctly. Go back to the
modGameCode module and add the following variable to the top of the
module:
Now add two lines to the InitialiseGame subroutine so that
it looks like this:
Public Sub InitialiseGame()
SetGameKeys
Set GameSheet = New clsGameSheet
GameSheet.CreateGameSheet
Set Bird = New clsBird
Set Bird.GameSheet = GameSheet
Set Wall = New clsWall
Wall.Initialise GameSheet
Set GameTimer = New clsTimer
GameTimer.StartTimer
End Sub
Add one line to the TerminateGame subroutine to dispose of
the Wall variable. The final subroutine should look like this:
Public Sub TerminateGame()
Set GameTimer = Nothing
Set Bird = Nothing
Set Wall = Nothing
shMenu.Activate
Set GameSheet = Nothing
ResetKeys
End Sub
Now head back to Excel and start the game. You should see the wall appear at
the right hand side of the screen.
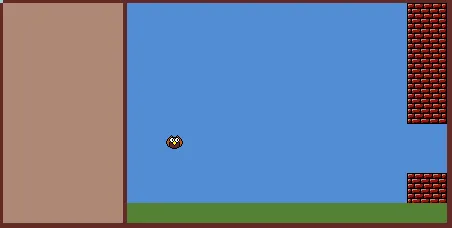
The wall should appear at the right hand side of the screen.
Try stopping and starting the game a few times to make sure that the gap appears
at different heights each time. If it doesn't work check through the code
carefully or download the working version from the top of the page.
Making the Walls Move
Each time the game updates we need to move the wall to the left by the amount
specified in the WallMoveRate variable. Head
back to the clsWall class module and add a new public
subroutine as follows:
Public Sub Update()
Dim NextColumn As Integer
Set WallTopPreviousRectangle = Range( _
WallTopCell, _
WallTopCell.Offset(WallTopHeight - 1, WallWidth - 1))
Set WallBottomPreviousRectangle = Range( _
WallBottomCell, _
WallBottomCell.Offset(WallBottomHeight - 1, WallWidth - 1))
NextColumn = WallTopCell.Column + WallMoveRate
If NextColumn <= pGameSheet.GameRange.Cells(1, 1).Column Then
CreateNewWall
Else
Set WallTopCell = _
Cells(WallTopCell.Row, NextColumn)
Set WallBottomCell = _
Cells(WallBottomCell.Row, NextColumn)
End If
End Sub
Now we need a procedure that will clear the wall image from its current
position and redraw it at the new position. Add the following subroutine to the
module:
Public Sub Draw()
WallTopPreviousRectangle.Interior.Color = _
GameColour.gcSkyBlue
WallBottomPreviousRectangle.Interior.Color = _
GameColour.gcSkyBlue
WallTopImage.Copy WallTopCell
WallBottomImage.Copy WallBottomCell
End Sub
Now we simply need to use these methods in the appropriate place in our game.
Head back to the modGameCode module and add two lines to the
UpdateAndDrawGame subroutine so that it looks like this:
Public Sub UpdateAndDrawGame()
If GetAsyncKeyState(vbKeyTab) <> 0 Then
TerminateGame
Exit Sub
End If
Bird.Update
Wall.Update
Bird.Draw
Wall.Draw
End Sub
Now go back to Excel and start the game. You should see the wall advances
from right to left, disappearing when it reaches the left edge of the game area
and reappearing at the right.
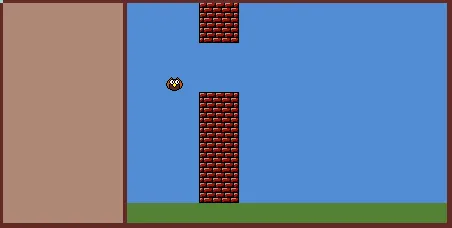
It doesn't matter whether you try to avoid the walls at this
point.
If you find that the game doesn't work check
the code carefully or download the working version from the link at the top of
the page.
What's Next
Now that we have the walls moving the next job is to detect when the bird
collides with them and what to do when that happens.


