Flappy Bird in Excel VBA - Creating Sprites
Useful Links
Return to the Flappy Bird in Excel VBA Tutorial index.
Download Flappy Owl Pt7 - Drawing Sprites.
Resources if you want to learn Excel or learn VBA more generally.
Introduction
So far our game has used a single coloured cell to represent our bird. This part of the tutorial will replace it with a marginally better-looking range of coloured cells, designed to look like an owl.
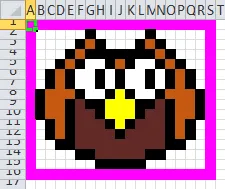
If you squint a bit and pretend really hard it almost resembles a drawing of an owl. By a two-year-old child. Who has never seen an owl.
Of course, if one were so inclined, one could easily find inspiration (ahem) from other sources...
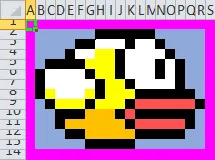
As I prefer not to run the risk of litigation I think I'll stick with my own image.
If you'd like to have a go at drawing your own bird feel free; it's virtually impossible to do worse than my attempt. We'll write the code in such a way that you can even make your own image larger or smaller than the one I'll use. In fact, the smaller the number of cells involved in your image, the quicker the game will run.
While there's something to be said for creating cute, cartoony graphics for a game it's often surprising how effective simple, abstract shapes can be. Terry Cavanagh is a master of this and his Maverick Bird tribute to Flappy Bird is my favourite version of the game. If you enjoyed that I'd also recommend Super Hexagon (or Hexagon if you want the free prototype version) - if you want a brutal reminder of how much reactions fade with age there's almost no substitute!
Setting up a Sprite Sheet
The individual images that make up a simple 2D game like ours are referred to as sprites. When creating games it's common to store a large number of individual sprites in a single image, referred to as a sprite sheet. We'll use a new worksheet for our sprite sheet, so head back into Excel and insert a new sheet called Sprites.

It doesn't matter where the sheet goes.
We'll resize the rows and columns on this sheet in the same way we did for the Test sheet earlier.
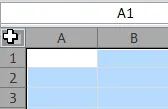
Start by clicking in the top left corner of the worksheet to select all of the cells.
Now click and drag between the rows and columns to resize the cells.
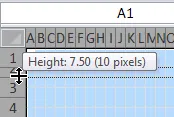
I've set my cells to 10 pixels wide and tall but feel free to choose a size which makes it comfortable for you to draw.
Although we're not going to add any code which references the Sprite sheet yet it's still worth heading into the VB Editor to give it a sensible code name.
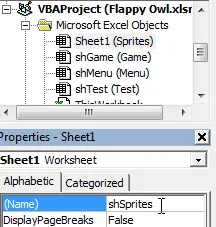
shSprites seems like a sensible code name for the worksheet.
Picking Colours for the Image
When you're picking colours for cells in Excel it's important to make sure that the colours will look the same when another person opens it in a different version of the application. For this reason we're not going to use the Theme Colors that are so prominent in the colour selection tools in Excel.
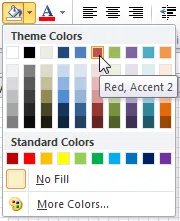
Picking this colour in this version of Excel with this particular theme applied doesn't guarantee that it will be the same colour when the file is opened in a different version of Excel.
Picking from the More Colors... option shown above provides you with a wider range of colours that will stay the same even if you apply a different theme to the workbook. The Colors dialog box has two different tabs.
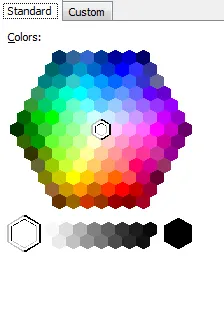 | 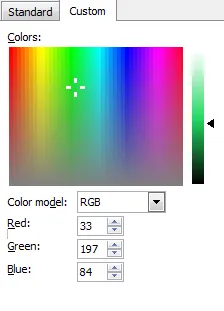 |
The Standard tab has a reasonable range of colours | The Custom tab contains a lot more! |
Colours that form part of a company's branding are usually defined using the RGB colour model (along with several others). This model specifies the amount of red, green and blue which make up the final colour. Each of the three RGB values ranges from 0 to 255 making the total number of combinations 16,777,216.
Drawing the Bird Sprite
Drawing our bird sprite is now simply a case of colouring in a range of cells until it resembles the shape of an owl. Now, I'm no expert on drawing sprites (clearly) but there are some great tutorials on pixel art, and these guys really are artists!
I started by drawing a basic outline in black, resulting in something like this:
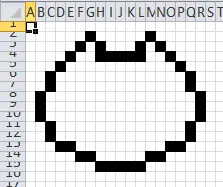
Using the keyboard shortcuts for copy, CTRL + C and paste, CTRL + V is a bit quicker than continuously selecting cells then clicking the Fill Color tool on the ribbon.
Next I put in the outline for the eyes, beak and wings:
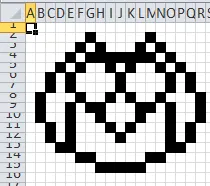
Putting in all the outlines makes it easier to colour in the different areas of the bird.
Next it was a case of colouring in the different regions of the bird shape. White for the eyes, yellow for the beak and two different shades of brown/orange for the wings and body.
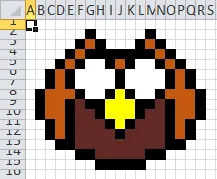
There was no particular reason for choosing the colours that I did.
The last step was to add the pupils.
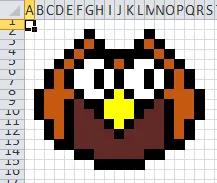
I had originally planned to put the pupils in the middle of each eye but I misjudged the size of the eyeball and accidentally drew them with an even number of cells. This meant that the pupils had to be offset. This actually makes it appear as though the owl is looking in the direction of the approaching obstacles in the finished game.
The above image is an example of what is affectionately known as programmer art. Essentially this means that it looks so bad that it encourages real artists to replace the image as soon as possible. Perhaps my favourite example of the difference professional art can make comes from the fantastic Gunpoint, by Tom Francis. It went from this, to this. Talented programmers who can also make great game art, like Josh Parnell, are rare and mysterious beings.
Framing the Sprite
To make it easier to see the rectangle in which the sprite sits we're going to add a simple frame around its border. Not all sprite sheets have sprite borders but for us it will help to select the cells when we create range names later. To make our sprite border stand out we're going to use a garish colour that wouldn't be used in any other part of our game's artwork.
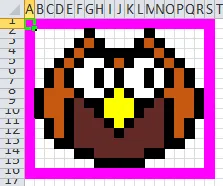
Our goal was to make the border stand out.
Creating a Range Name
In order to make our image easier to reference in code we're going to assign a range name to its range of cells. To do this, start by selecting the cells which make up the image, then click into the Name Box at the top left of the worksheet.
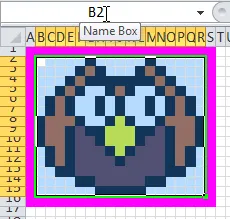
The Name Box sits just above the worksheet on the Formula Bar.
Now you can type in a name for the range of cells and press Enter to create the range name. Range names can't contain spaces or most punctuation characters - I'm giving my range the name OwlImage.
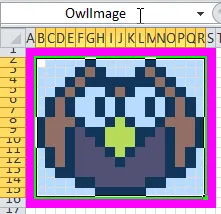
Don't forget to press Enter to create the range name. If the text isn't centred in the Name Box then the range name hasn't been created.
If you entered the wrong name by mistake or you selected the wrong range of cells you can edit the range name using the Name Manager tool. To open it choose Formulas | Name Manager or just press CTRL + F3 on the keyboard.

Select the range name you want to modify and click Edit... to update its name or the range of cells to which it refers.
Using the Sprite in the Game
Incorporating the sprite into the game requires a little bit of effort. Let's start by adding some variables to the modBirdCode module. Declare these three variables at the top of the module:
Private BirdImage As Range
Private BirdHeight As Integer
Private BirdWidth As Integer
While you're at the top of the module, change the name of the BirdPreviousCell variable so that it's called BirdPreviousRectangle. The full list of variables that you should have at the top of this module should now look like this:
Private BirdImage As Range
Private BirdHeight As Integer
Private BirdWidth As Integer
Private BirdCell As Range
Private BirdPreviousRectangle As Range
Private BirdVerticalMovement As Long
Private Const Gravity As Byte = 1
Private Const FlapHeight As Integer = -8
Private Const DiveDepth As Integer = 8
Private FloorRange As Range
Private PreviousUpKeyState As Integer
Private PreviousDownKeyState As Integer
Next, we're going to modify the InitialiseBird subroutine; add these three lines to the top of the procedure:
Public Sub InitialiseBird()
Set BirdImage = shSprites.Range("OwlImage")
BirdHeight = BirdImage.Rows.Count
BirdWidth = BirdImage.Columns.Count
In the same subroutine delete the line which colours in the BirdCell and replace it with this one:
This line applies the Copy method to the cells which make up our owl image and sets the destination range to the BirdCell range. Even though we're copying multiple cells from the owl image we only need to provide the top left corner of the range into which we're pasting.
Yep, that's right, the graphics system of our game is basically copy and paste!
There are a couple of other possible ways to place the owl image in the correct place, for instance we could loop over the range of cells in the image, storing the colour of each in an array. We'd then have to loop over the array to set the correct colour of each destination cell. While this might feel intellectually more rigorous it wouldn't work anywhere near as quickly.
The final version of the InitialiseBird routine should look like this:
Public Sub InitialiseBird()
Set BirdImage = shSprites.Range("OwlImage")
BirdHeight = BirdImage.Rows.Count
BirdWidth = BirdImage.Columns.Count
Set BirdCell = shTest.Range("R5")
BirdImage.Copy BirdCell
BirdVerticalMovement = 0
Set FloorRange = shTest.Range("A40:Z40")
FloorRange.Interior.Color = rgbBlack
PreviousUpKeyState = GetAsyncKeyState(vbKeyUp)
PreviousDownKeyState = GetAsyncKeyState(vbKeyDown)
End Sub
Now we need to modify the UpdateBird subroutine. There's only one line that we'll change for now: delete the line which says Set BirdPreviousCell = BirdCell and replace it with this line:
Set BirdPreviousRectangle = _
Range(BirdCell, BirdCell.Offset(BirdHeight - 1, BirdWidth - 1))
The last change that we'll make before testing the game will make sure that the bird gets drawn. Replace the DrawBird subroutine with this version:
Public Sub DrawBird()
BirdPreviousRectangle.ClearFormats
BirdImage.Copy BirdCell
End Sub
Testing the Game
It's time to test the result of our artistic endeavours. Bear in mind that the cells on the test sheet are still quite large so the bird will take up a large portion of the screen - on the final game sheet we'll have much smaller cells. Apart from this there's another problem that we have to solve. See if you can spot it when you run the game.
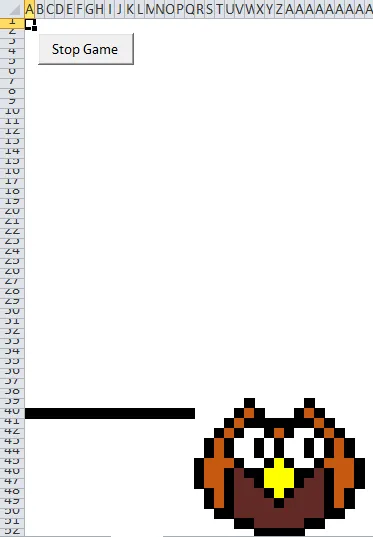
Apart from the fact that the bird looks monstrous, the big problem is that he falls through the floor.
There's also some pretty horrible screen flickering, at least on the machine that I'm testing the game on. I haven't solved this yet but it will help you to sleep tonight if I tell you that it's on my to do list.
Offsetting the Sprite
Remember that we stopped the bird from falling through the floor by testing if the BirdCell range was lower than the floor? Well, that range is in the top left corner of the bird image and we need to test for a cell at the bottom of the bird image by offsetting a number of rows down from the BirdCell range.
The most convenient thing to do here is to use the height of the image to provide the offset. Change the first two lines of the If statement in the UpdateBird subroutine so that it looks like this:
If TargetRow + (BirdHeight - 1) >= FloorRange.Row Then
TargetRow = FloorRange.Row - BirdHeight
If you run the game now you should see that the bird sits happily on the floor and still can't fly past the top of the screen.
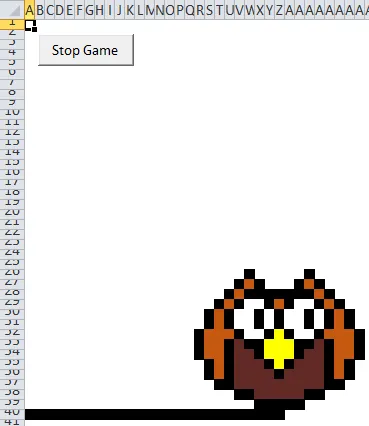
It's still not pretty, but at least it's becoming more functional.
If you had any problems with getting the game to run you can download a working copy from the top of the page as usual.
What's Next
The next step is to do a little house-keeping and tidy up the organisation of our code. We're going to achieve this by re-writing some of our existing modules as class modules.
Idea for a Side Project
If we were going to be drawing lots of sprites for a game it would be really tedious using Excel's basic fill colour tool. A cool idea would be to create a sprite editor workbook which uses worksheet events to detect when cells have been clicked and changes the colour based on some kind of selection tool. It would also have to be able to switch between drawing mode and selection mode (so that you could click on cells without colouring them in), perhaps by detecting whether the user was holding down a key when they clicked on a cell?
This would probably only be worth doing if I was planning on a career in making games in Excel. I'm not.


